Swift Pro Experiments
How to setup Raspberry Pi zero 2W.
- The Swift Pro features an integrated camera and Raspberry Pi, enabling you to perform various tasks.
- To boot Ubuntu, download the Raspberry Pi Imager.
- You will need an 8/16/32/64 GB SD card.
- Connect the SD card to your PC using an SD card reader.
- Format the SD card using your file manager to delete all content, then open the Raspberry Pi Imager.
Steps to Boot Ubuntu:
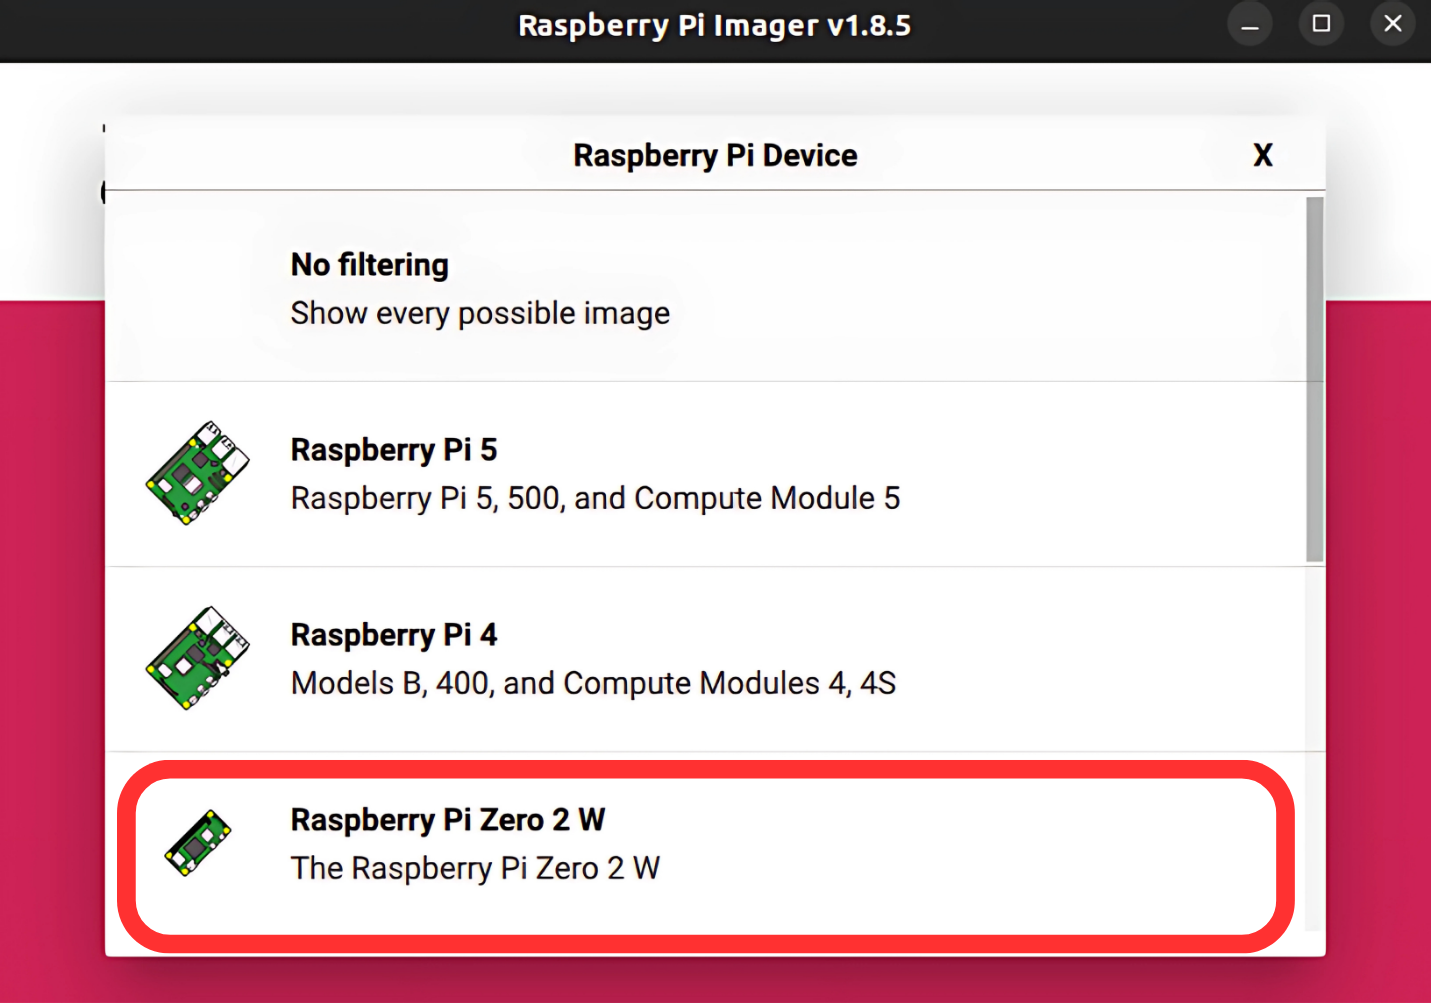
- Select Device: RASPBERRY PI ZERO 2 W.
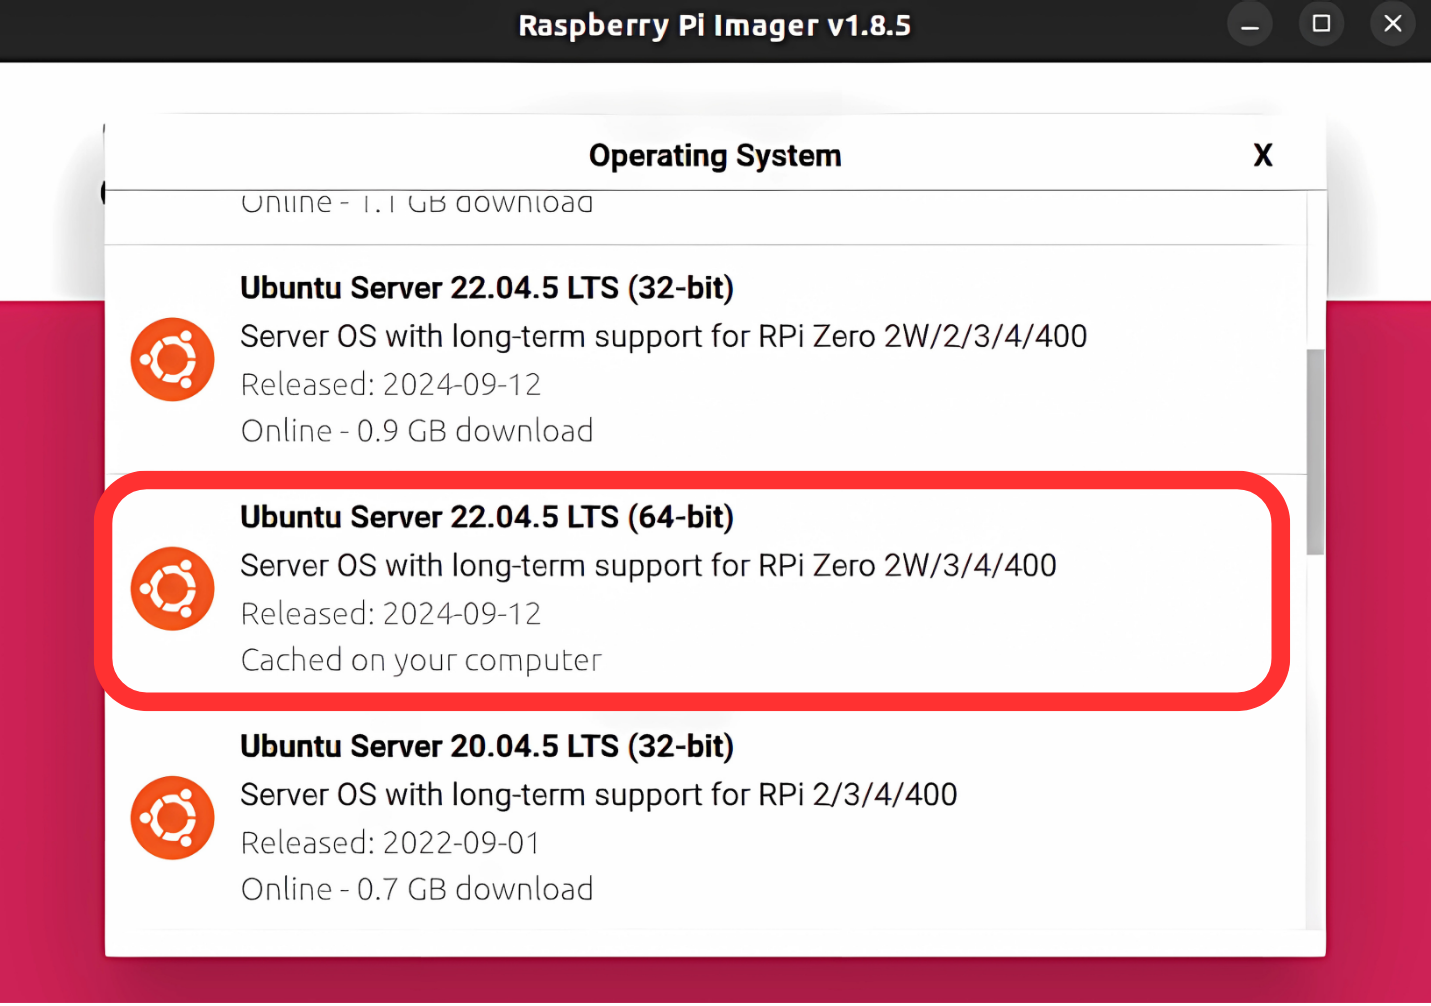
- Choose OS: Other general-purpose OS > Ubuntu > Ubuntu Server 22.04.5 LTS (64-bit).
- Choose Storage: Select the appropriate storage.
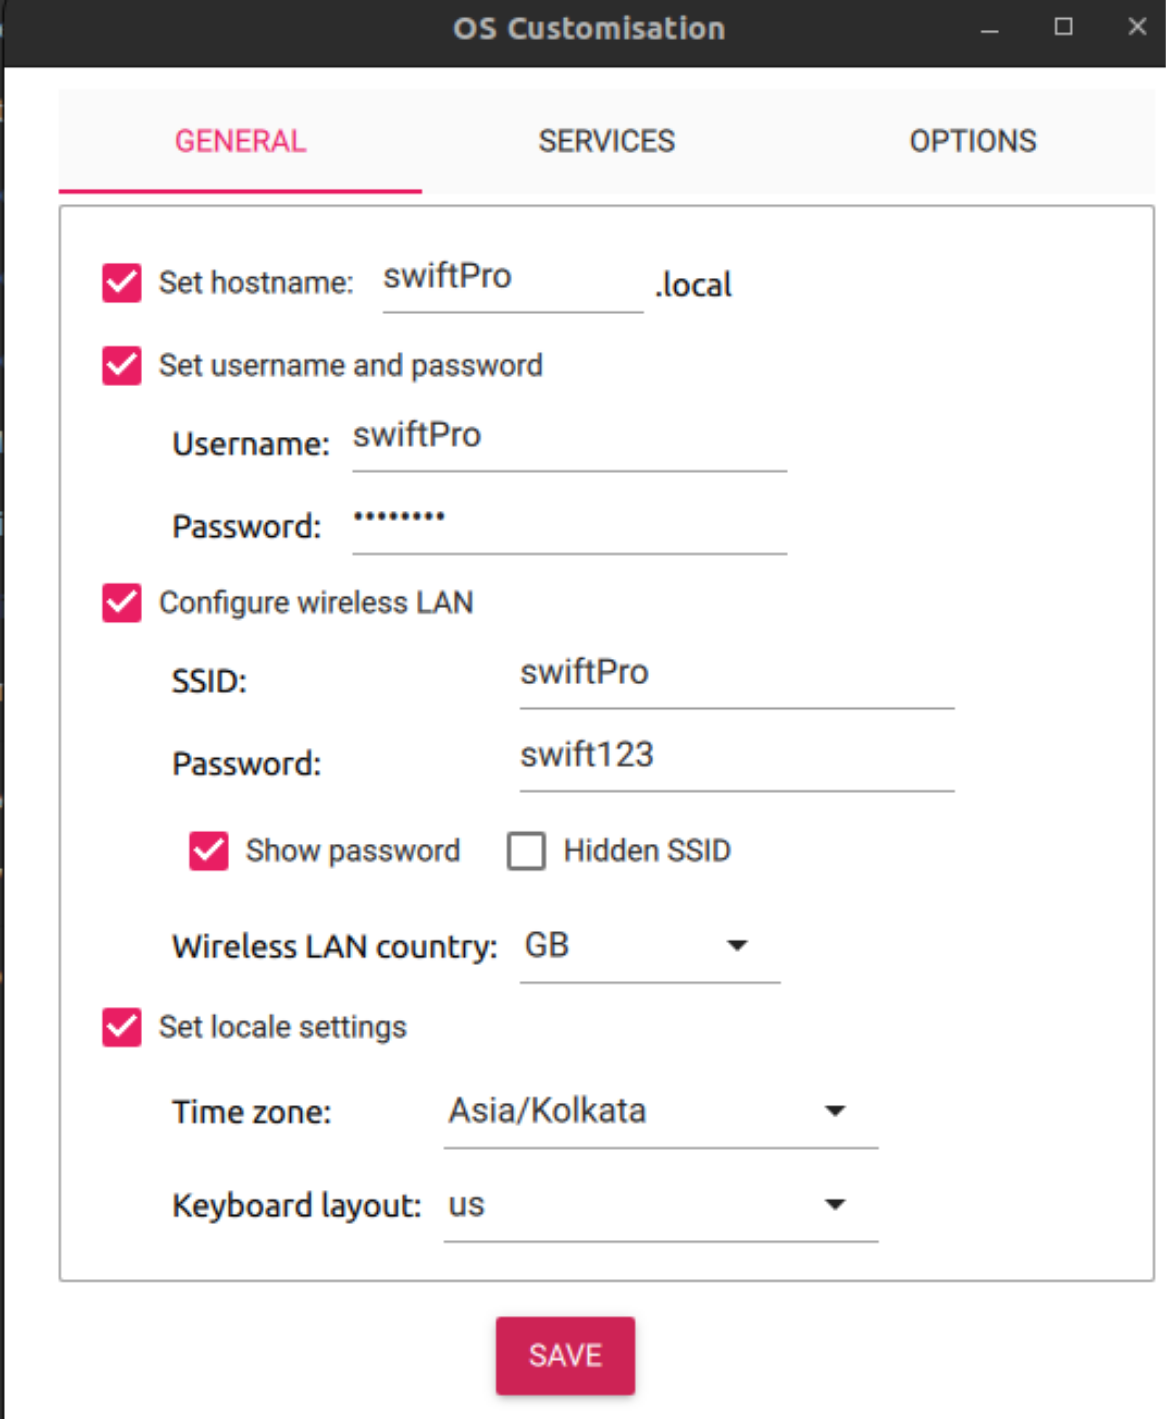
- Press Next, then click on the Edit Settings button.
- Set Hostname:
swiftPro(or any name you prefer). - Set Username:
swiftPro(or any name you prefer). - Set Password:
swift123(or any password you prefer). - Set SSID: Your
swiftPro. - Set Password:
swift123. - Go to services and tick
Enable SSHand chooseUse password authentication. - Press
savebutton ->Yest
- Enter the system Password if asked and wait until the process is complete.
The boot process is complete. We chose Ubuntu 22 to facilitate ROS2 operations.