How To Setup Radio Master for First time
- Note: This step is optional RadioMaster's Phrase binding is already done.
What is Binding of Receiver and Transmitter ?
The RadioMaster Boxer (Transmitter) should be properly connected with the corresponding ExpressLRS (Receiver). To establish communication between them, a binding process is required. This ensures that the transmitter and receiver can communicate effectively during operation.
Kit Setup
In Kit there are three Drones out of which two drones has GEPRC ELRS NanoSE Receiver and Garuda Mini has ER6 2.4GHz ELRS PWM Receiver and one RadioMaster Boxer for which we have to set the binding so that it should not connect to any other receiver.
Since we have one Transmitter and three different receiver with three different drones we will set same binding Phrase so that it will be easy to use.
RadioMaster Boxer Binding Setup
Step 1: Power On the RadioMaster Boxer
Press and hold the power button to turn on the RadioMaster Boxer.
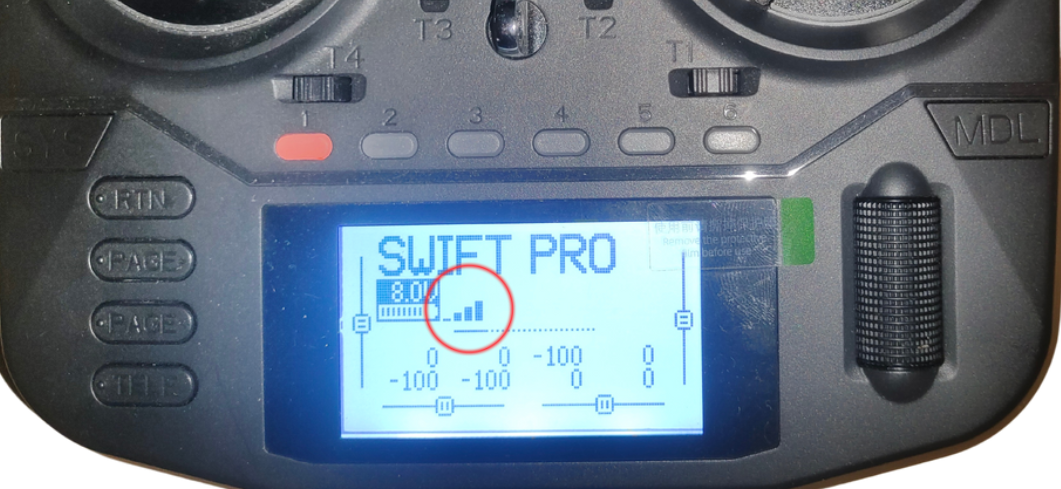
Step 2: Access the System Menu
Press the
SYSbutton located on the left side of the transmitter.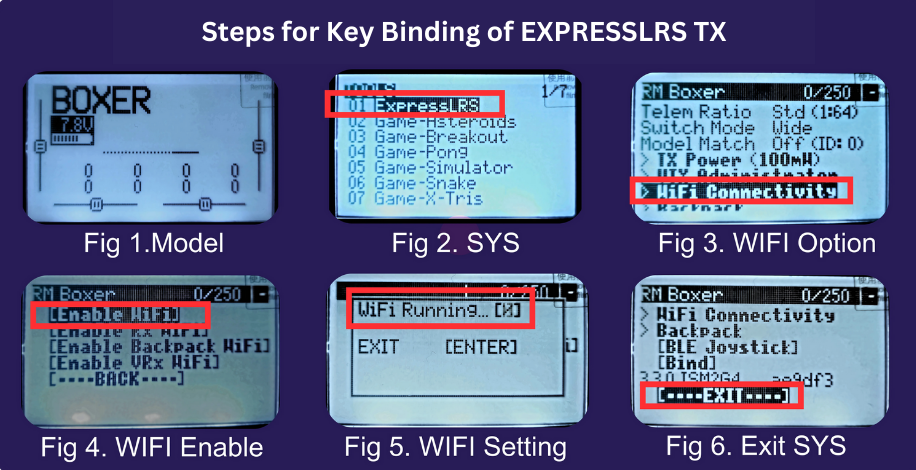
The system menu will appear on the screen, as shown in Fig 2.
Step 3: Select the ExpressLRS Option
Using the scroll wheel, navigate to the
ExpressLRSoption and press the center of the wheel to select it.The menu will update on the screen, as shown in Fig 3.
Step 4: Enable WiFi Connectivity
Scroll to the
WiFi Connectivityoption and press the center of the wheel to select it.The menu will update on the screen, as shown in Fig 4.
Step 5: Turn On WiFi
Select the
Enable WiFioption to activate the WiFi feature.This will enable the WiFi on the transmitter, allowing for configuration. The menu on the screen will update, as shown in Fig 5.
Step 6: Connect to the ExpressLRS Hotspot
On your laptop, connect to the
ExpressLRS TXhotspot. The password for the hotspot isexpresslrs.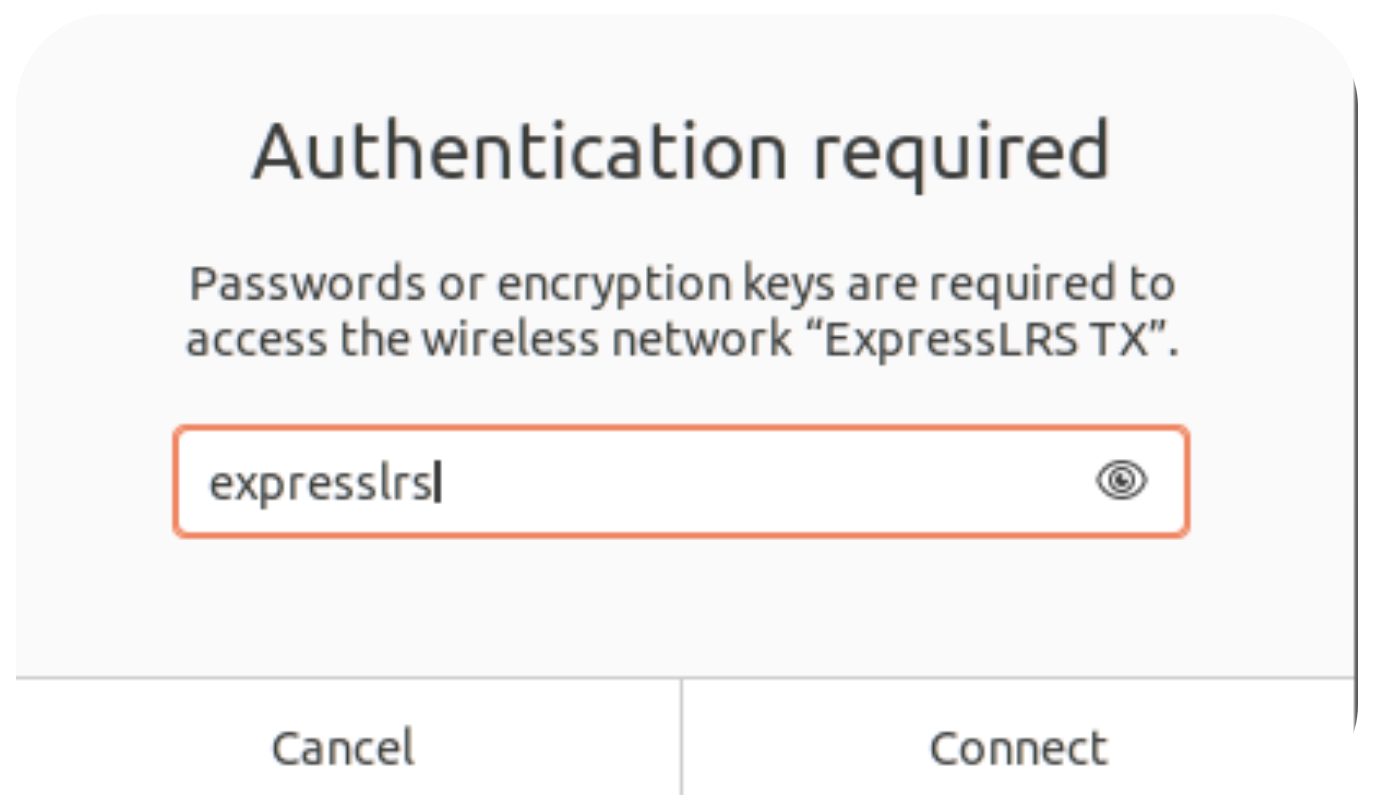
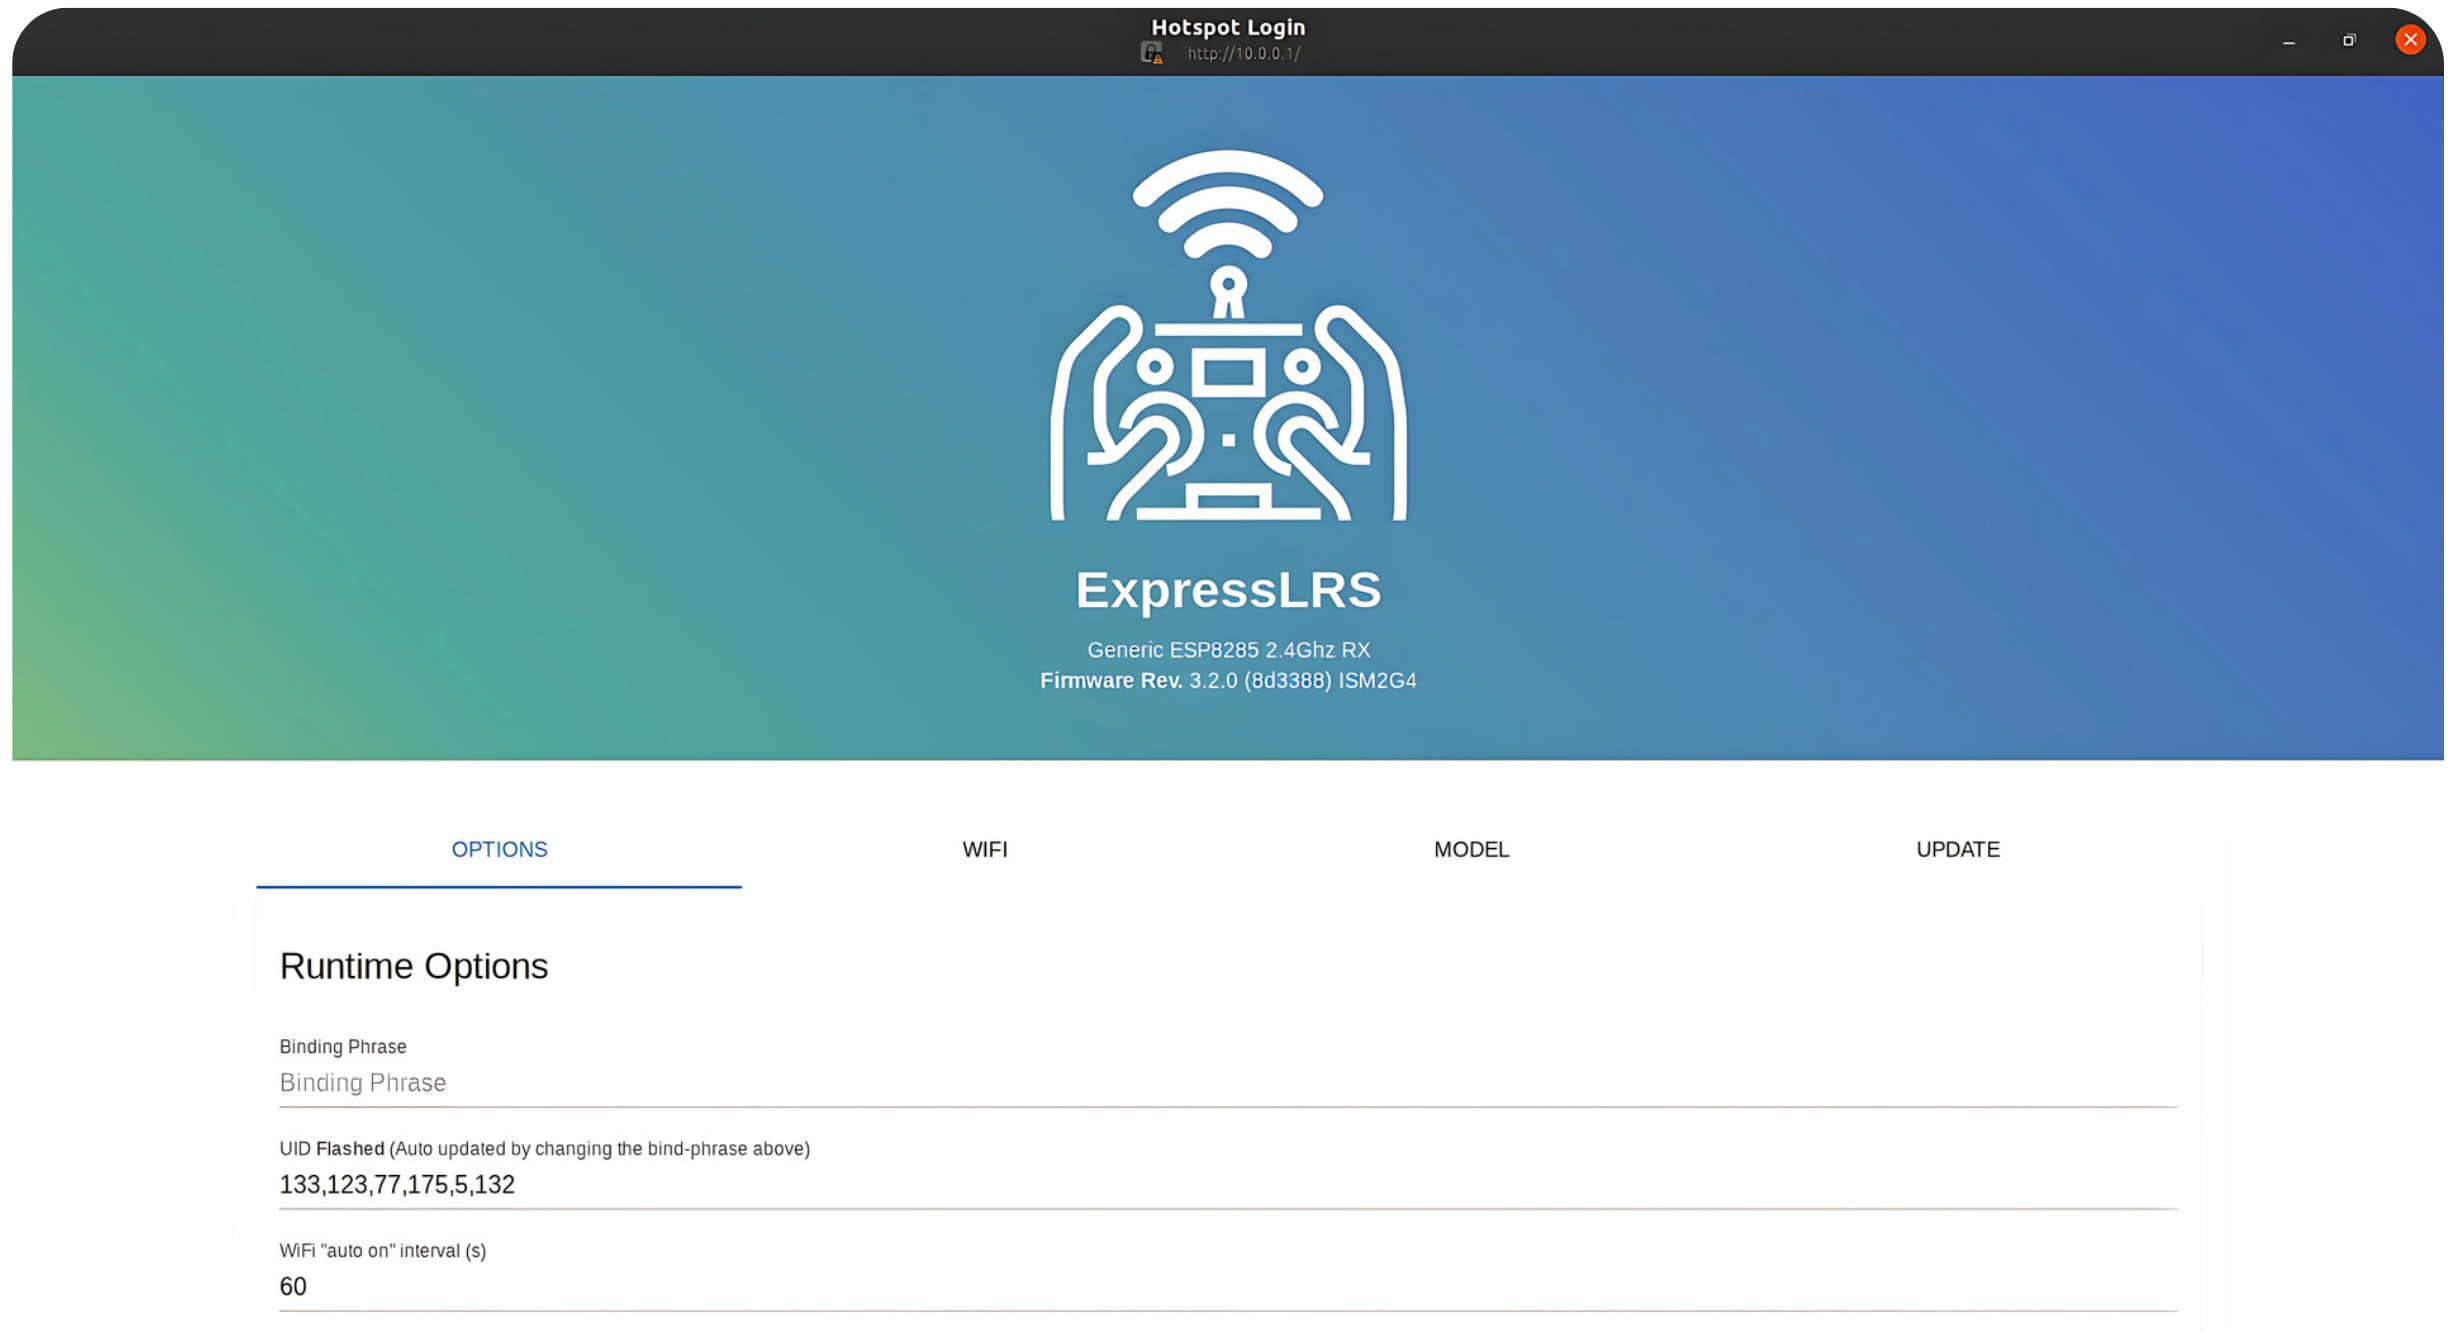
Step 7: Access the Configuration Page
Once connected to the hotspot, open a browser and navigate to http://10.0.0.1/. If the page does not open automatically, manually type the URL in the browser.
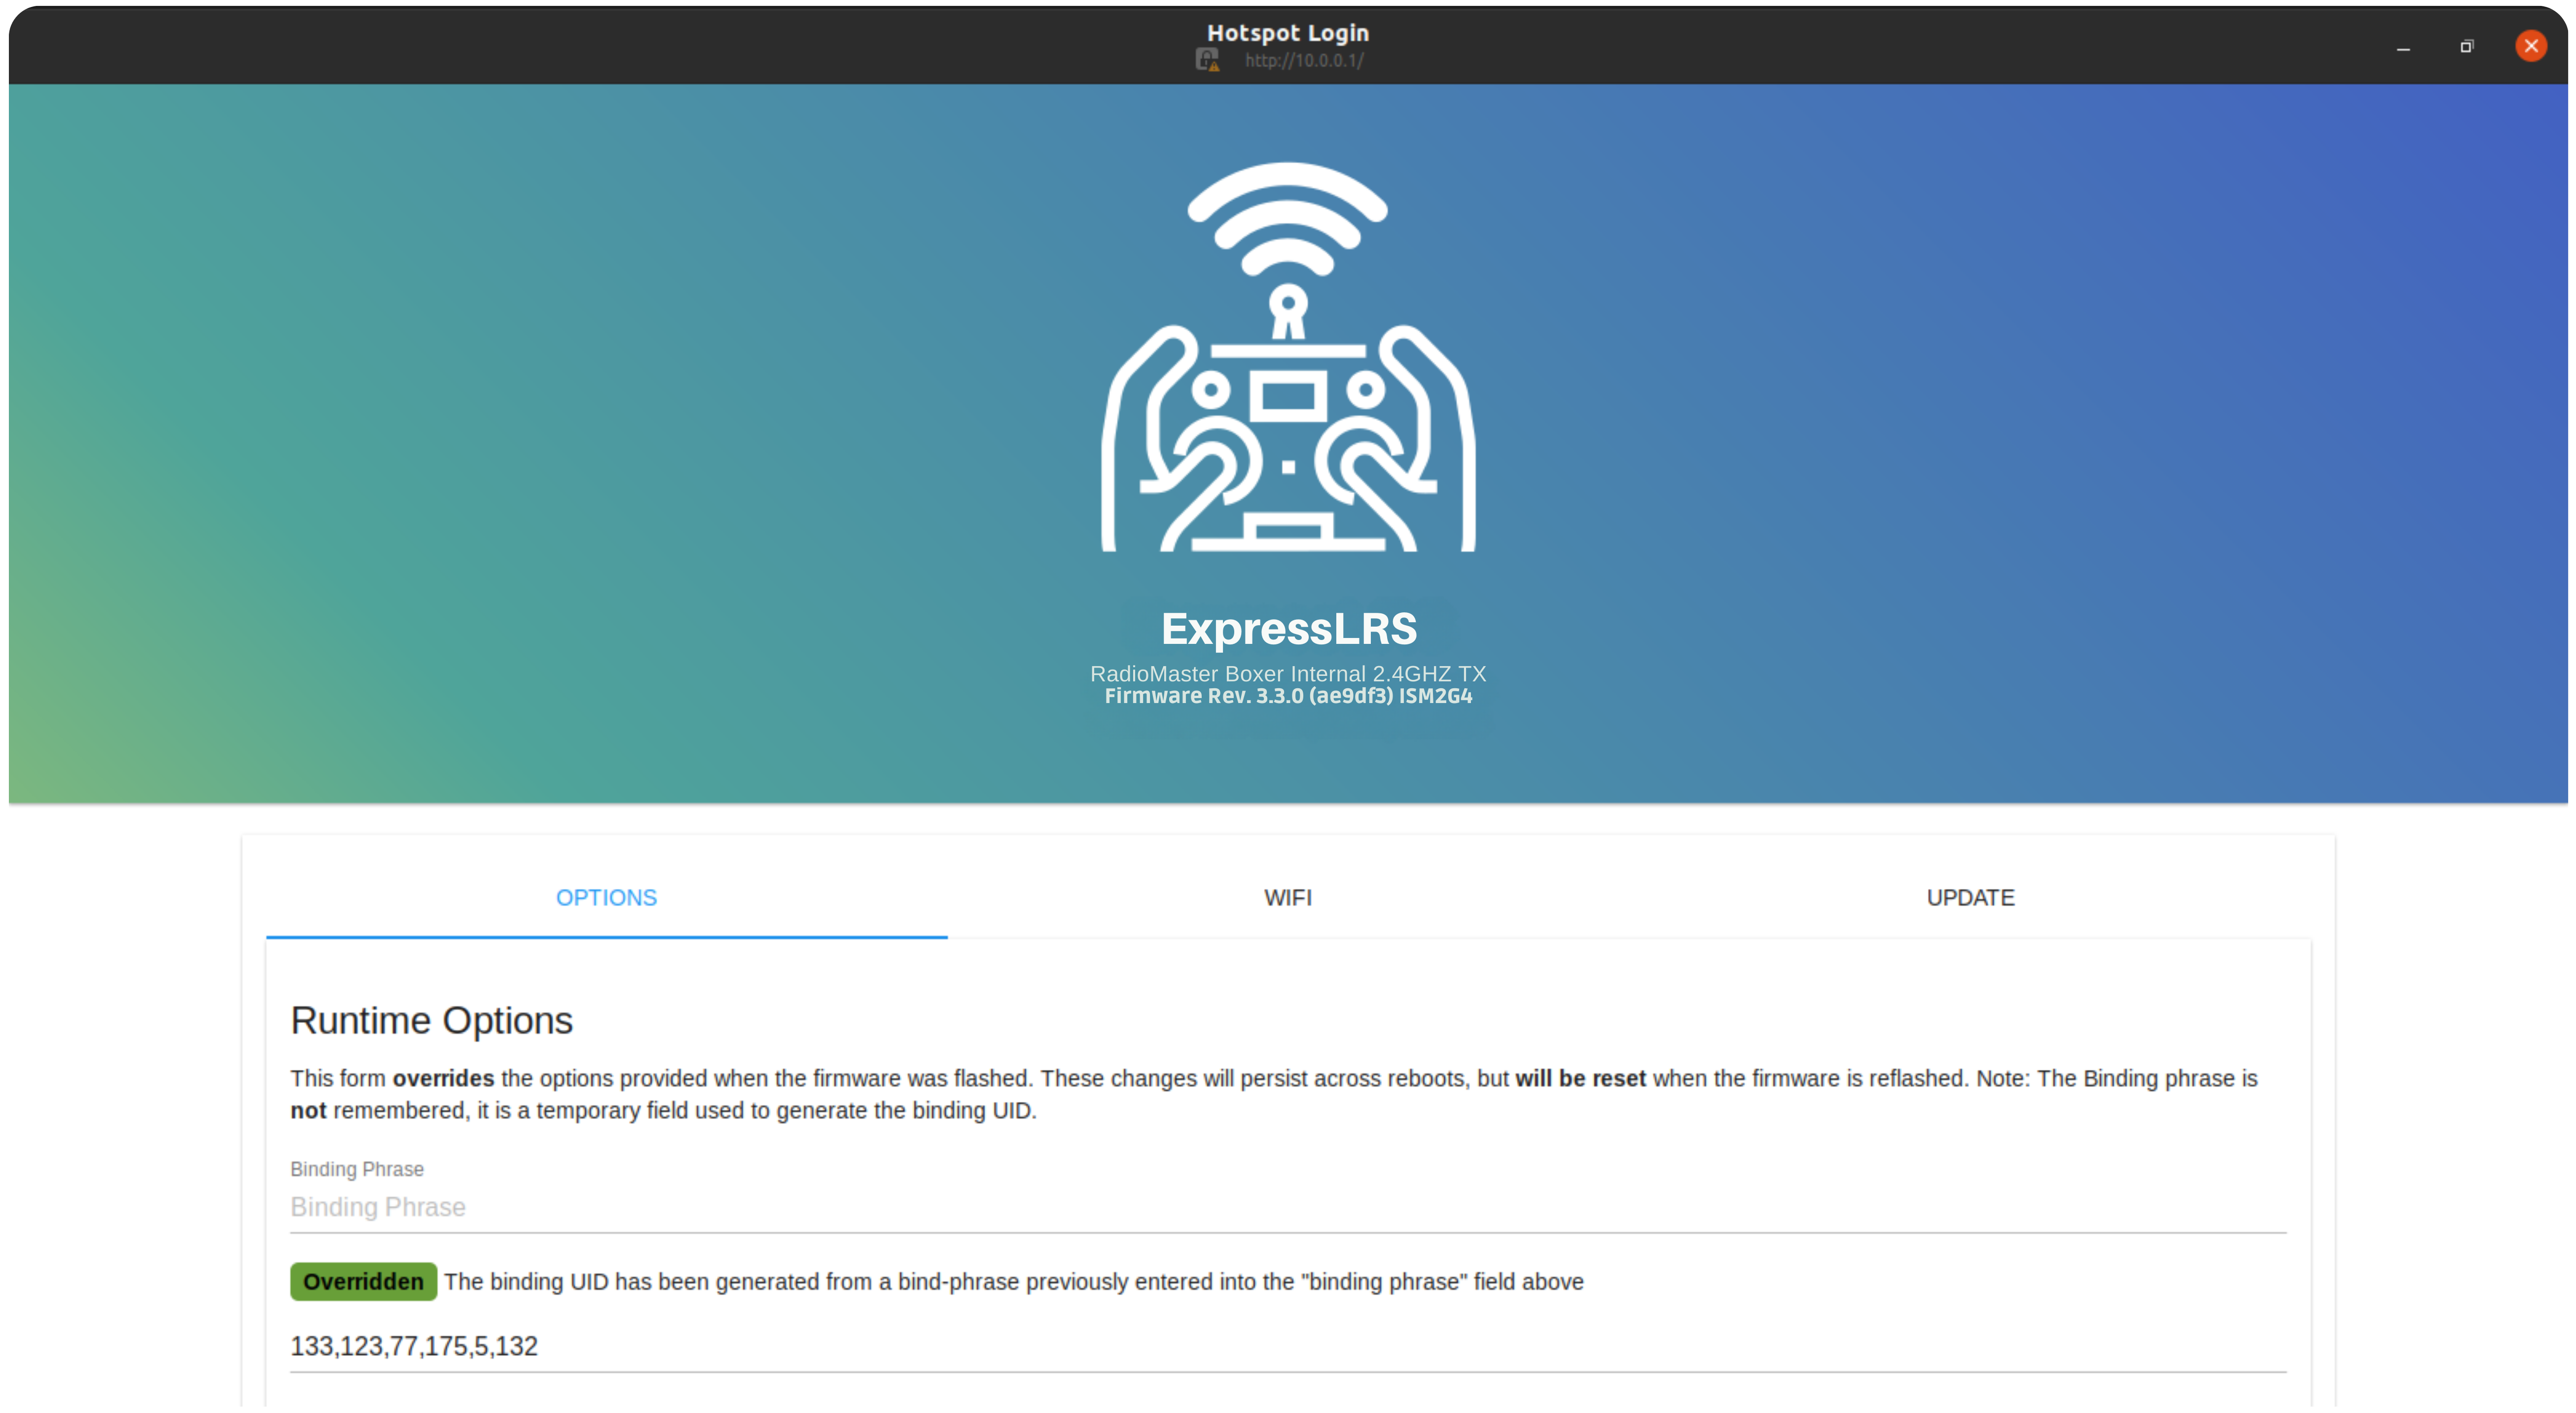
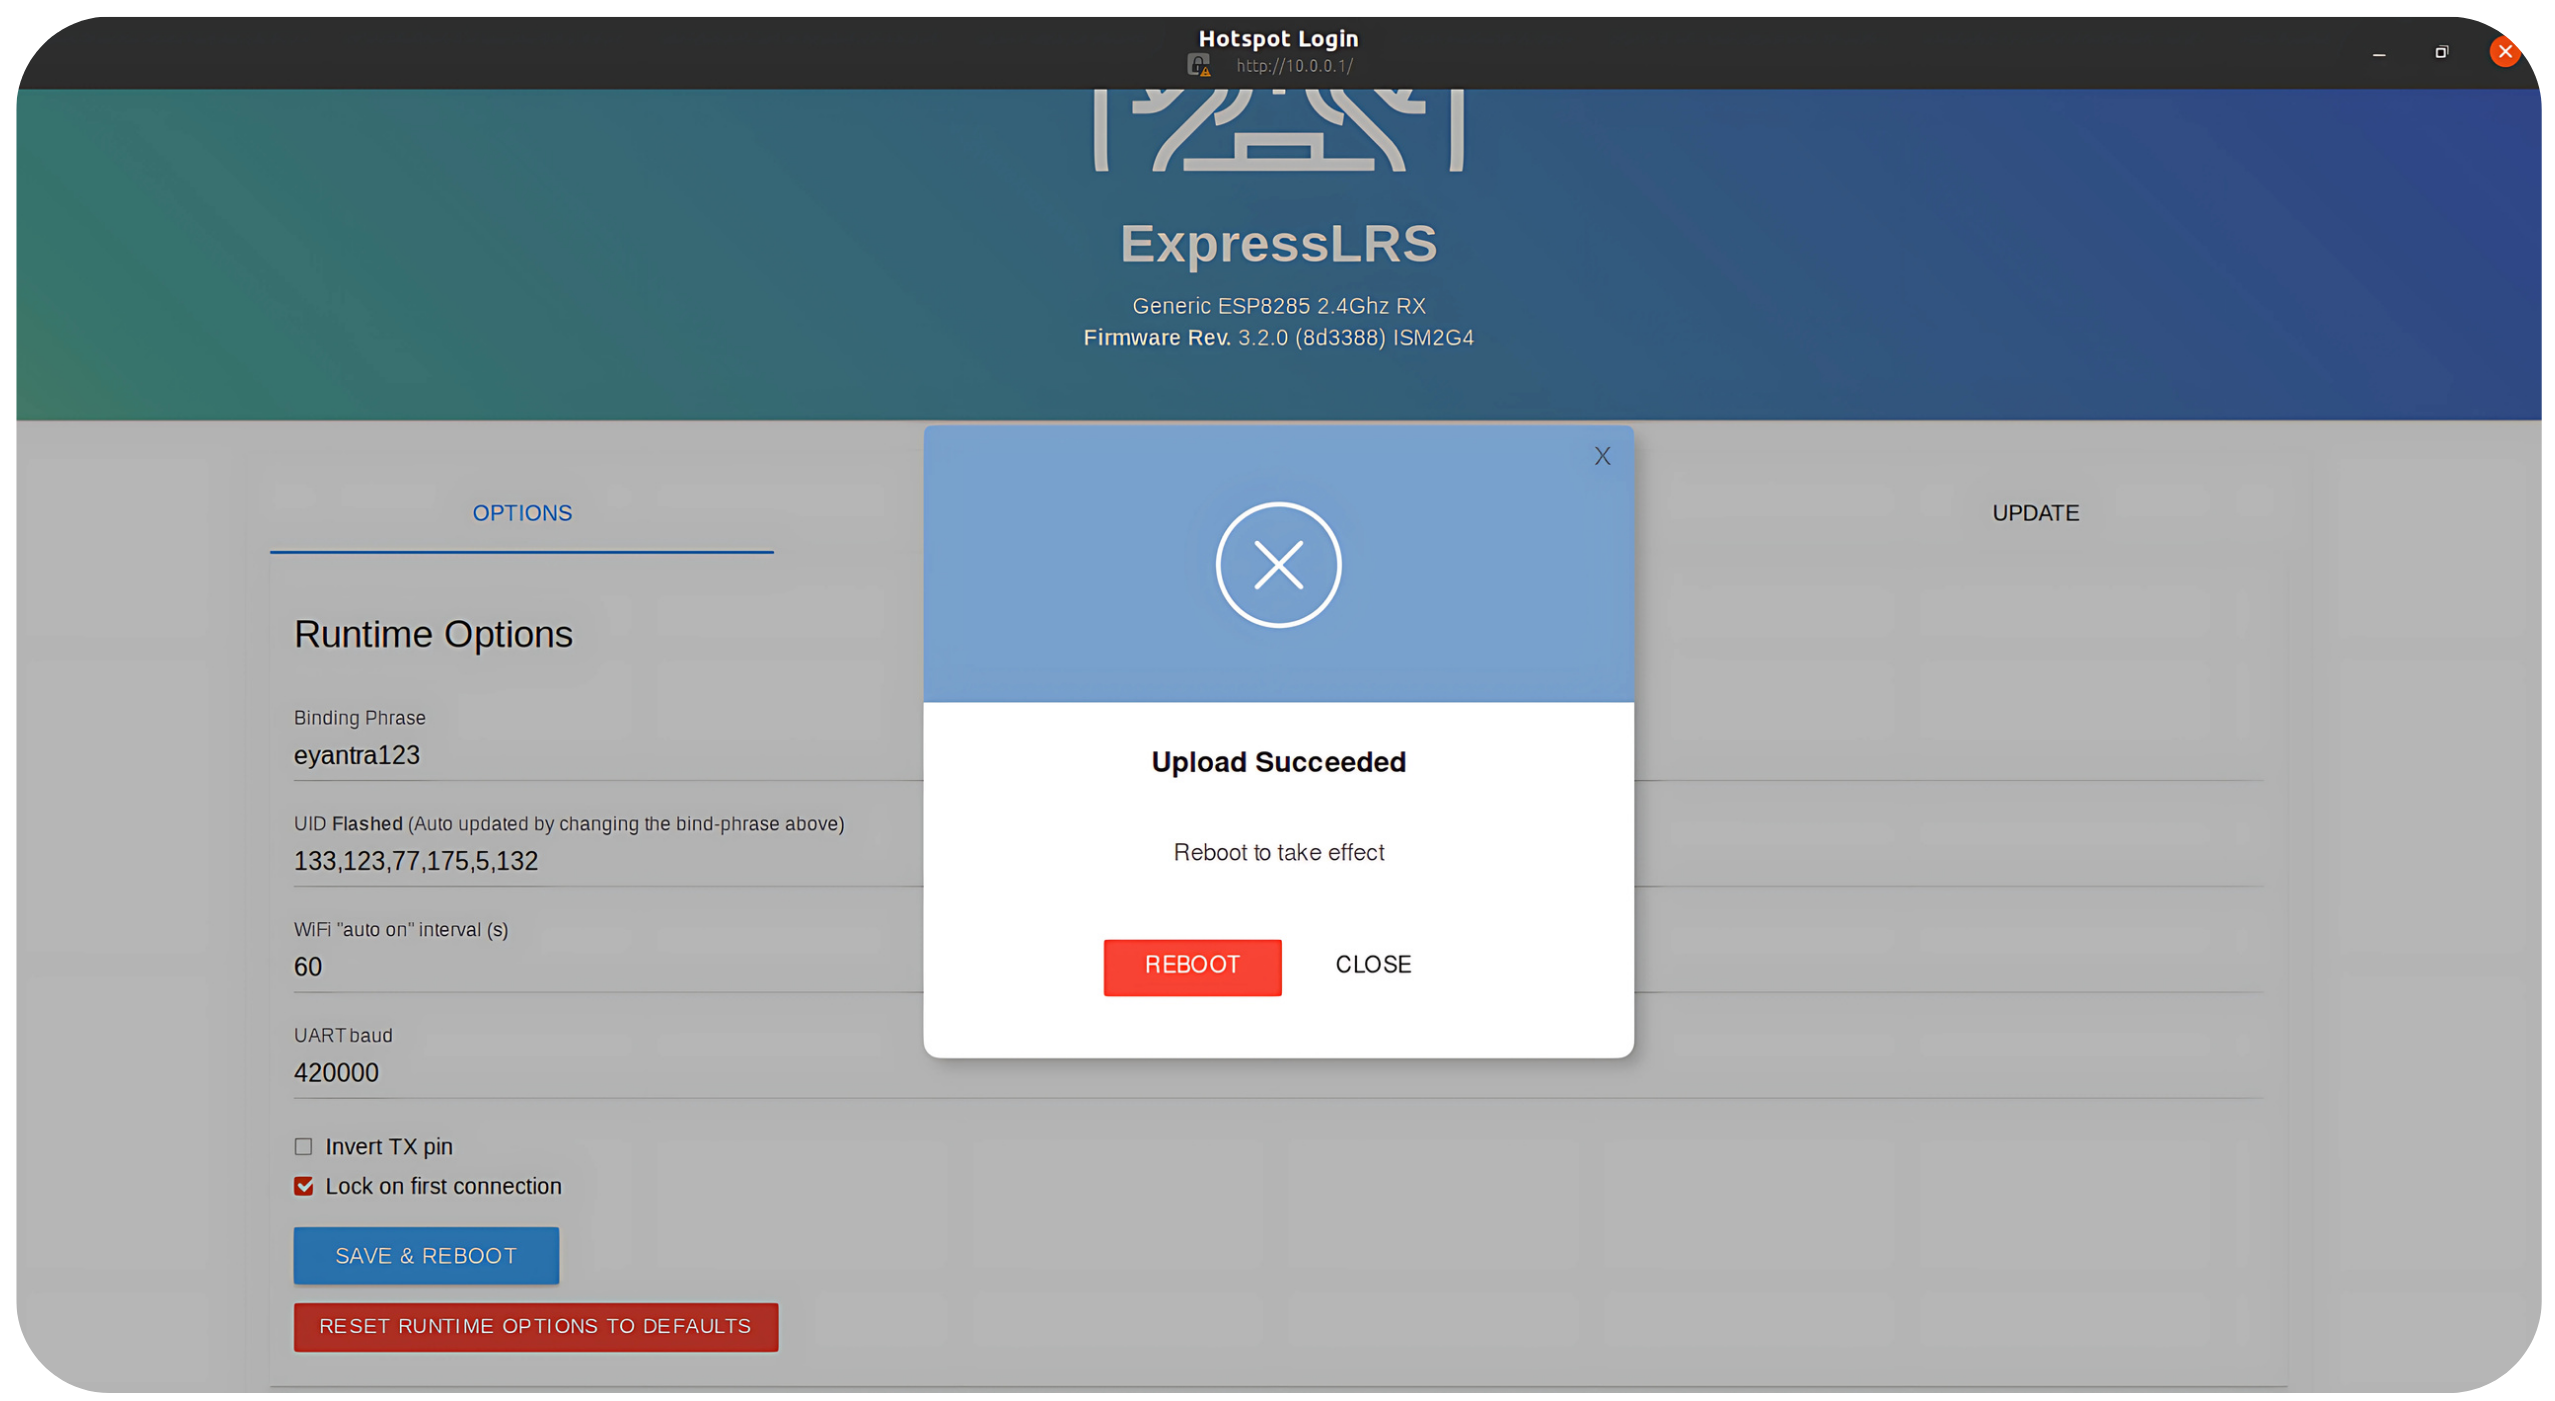
Step 8: Set the Binding Phrase
In the configuration page, set the Binding Phrase. It is crucial that both the receiver and transmitter are using the same Phrase. The default Phrase is
eyantra123.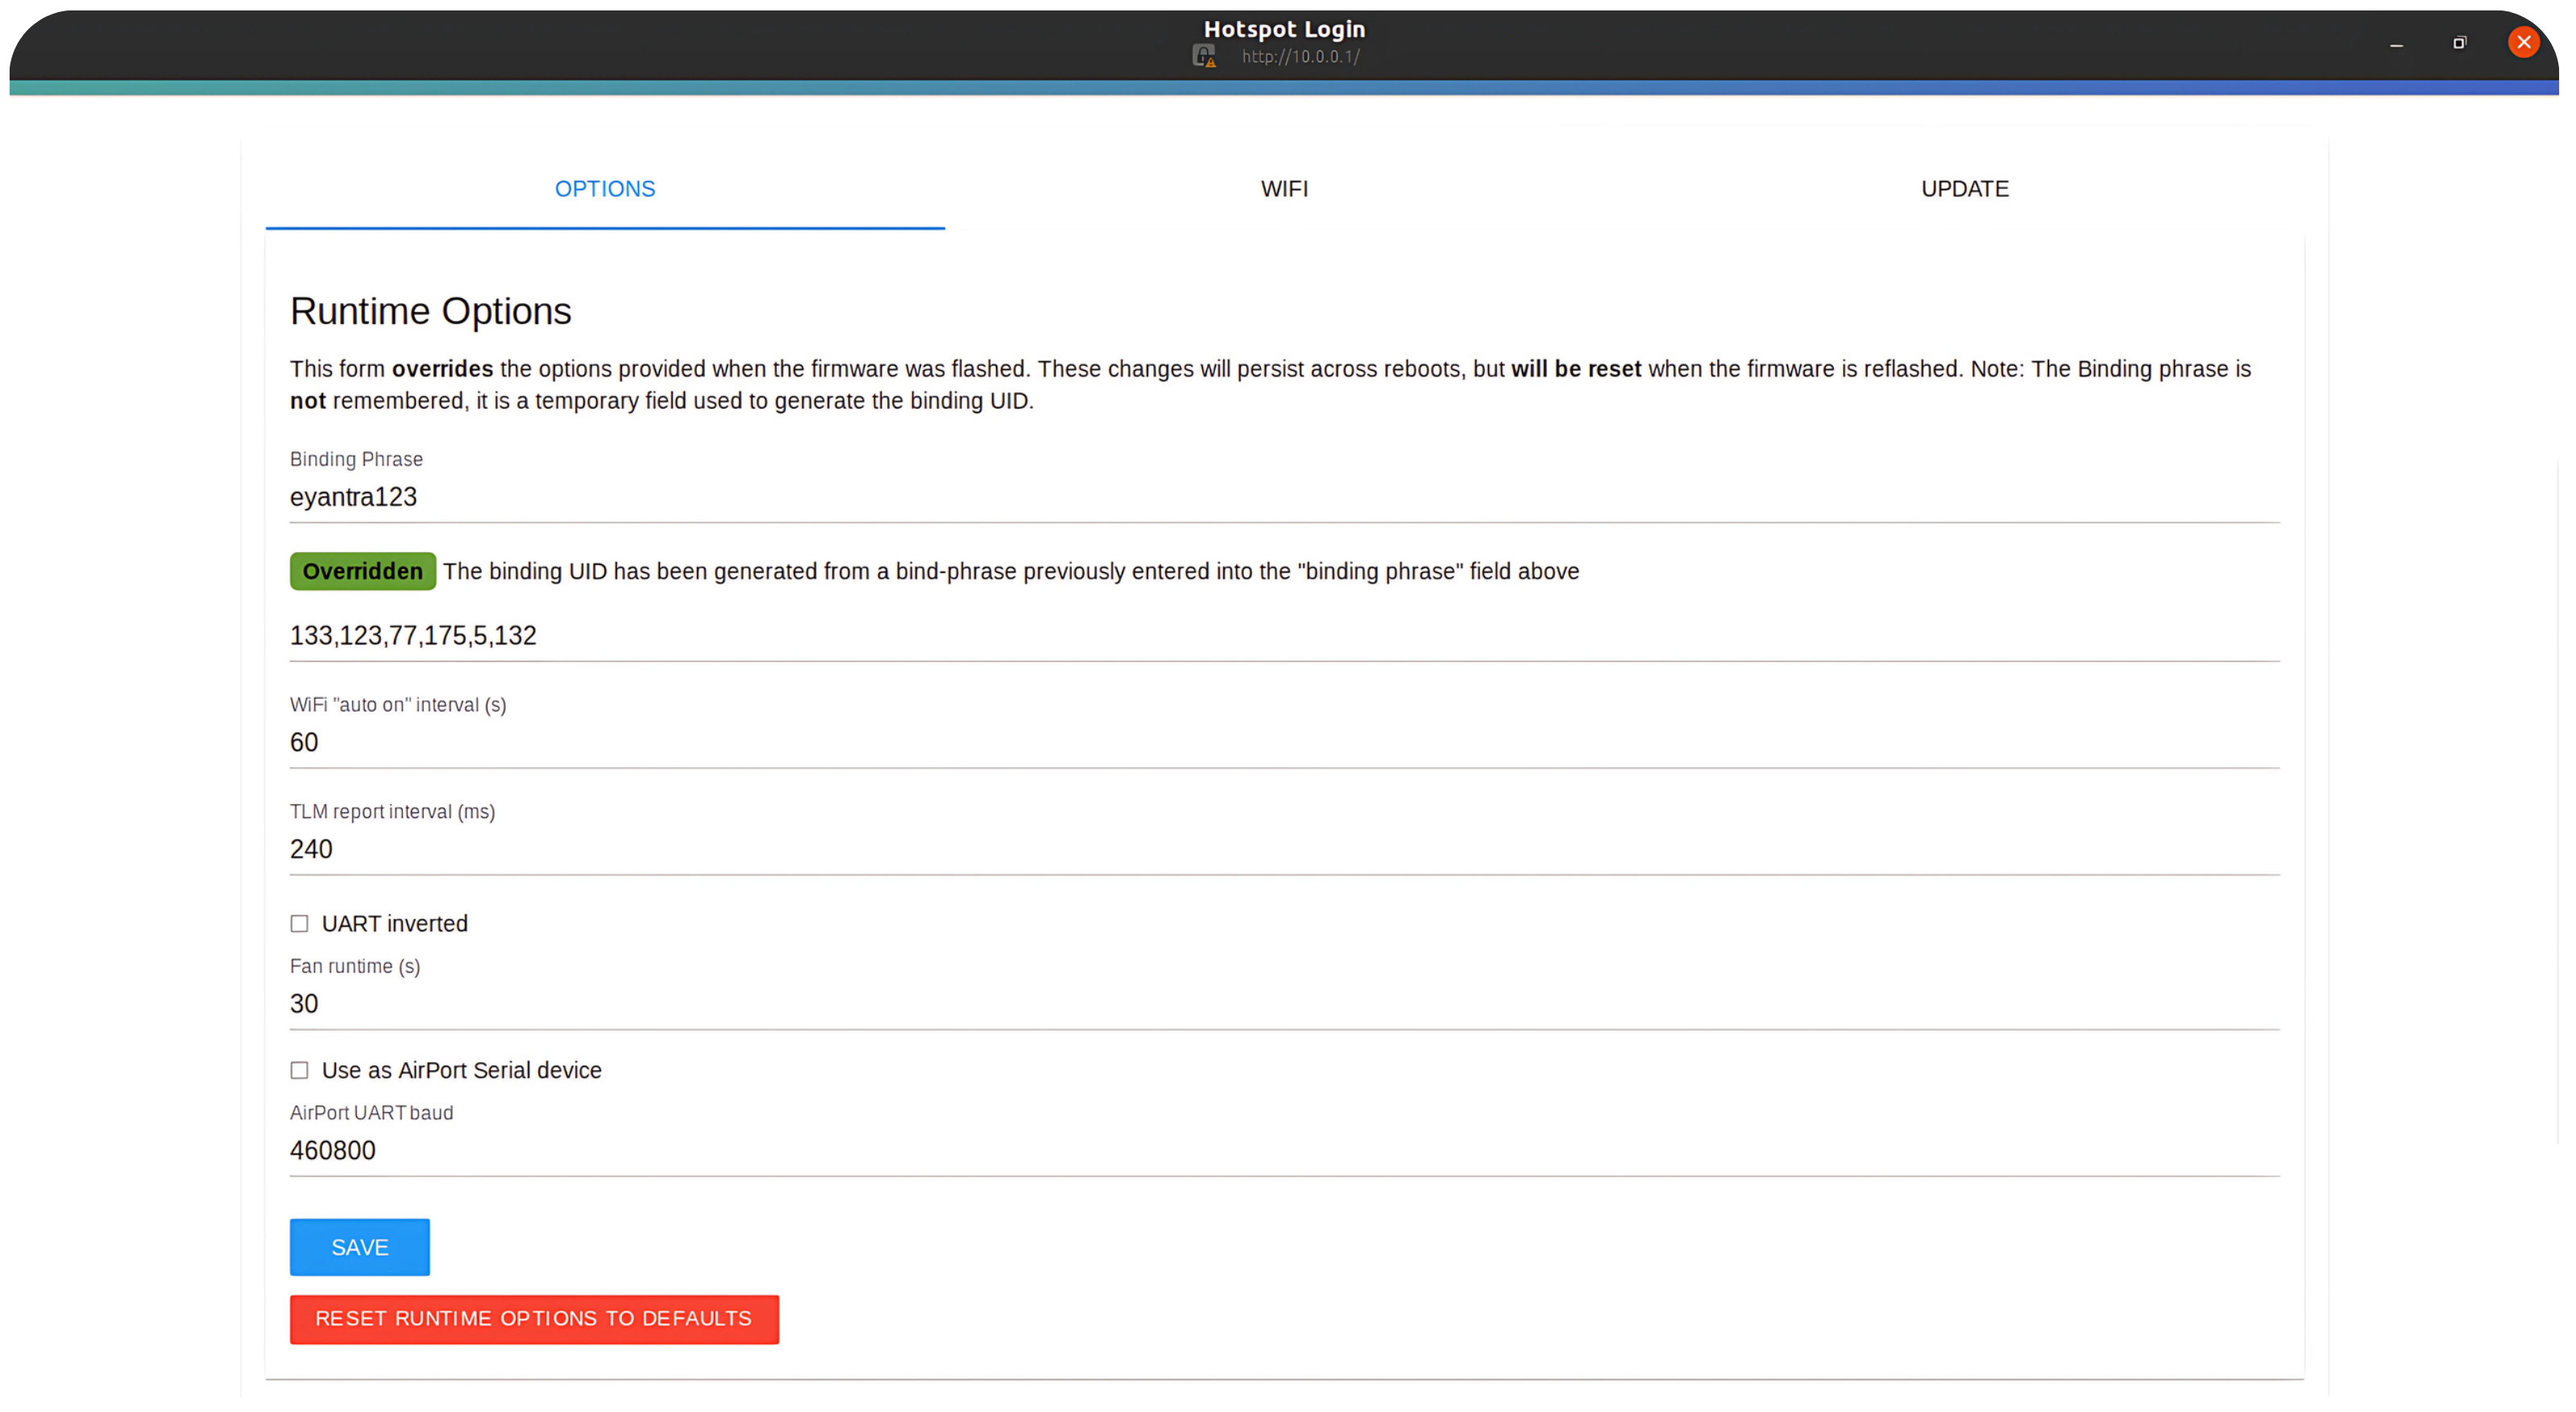
Step 9: Save the Configuration
After ensuring the correct settings, click the Save button.
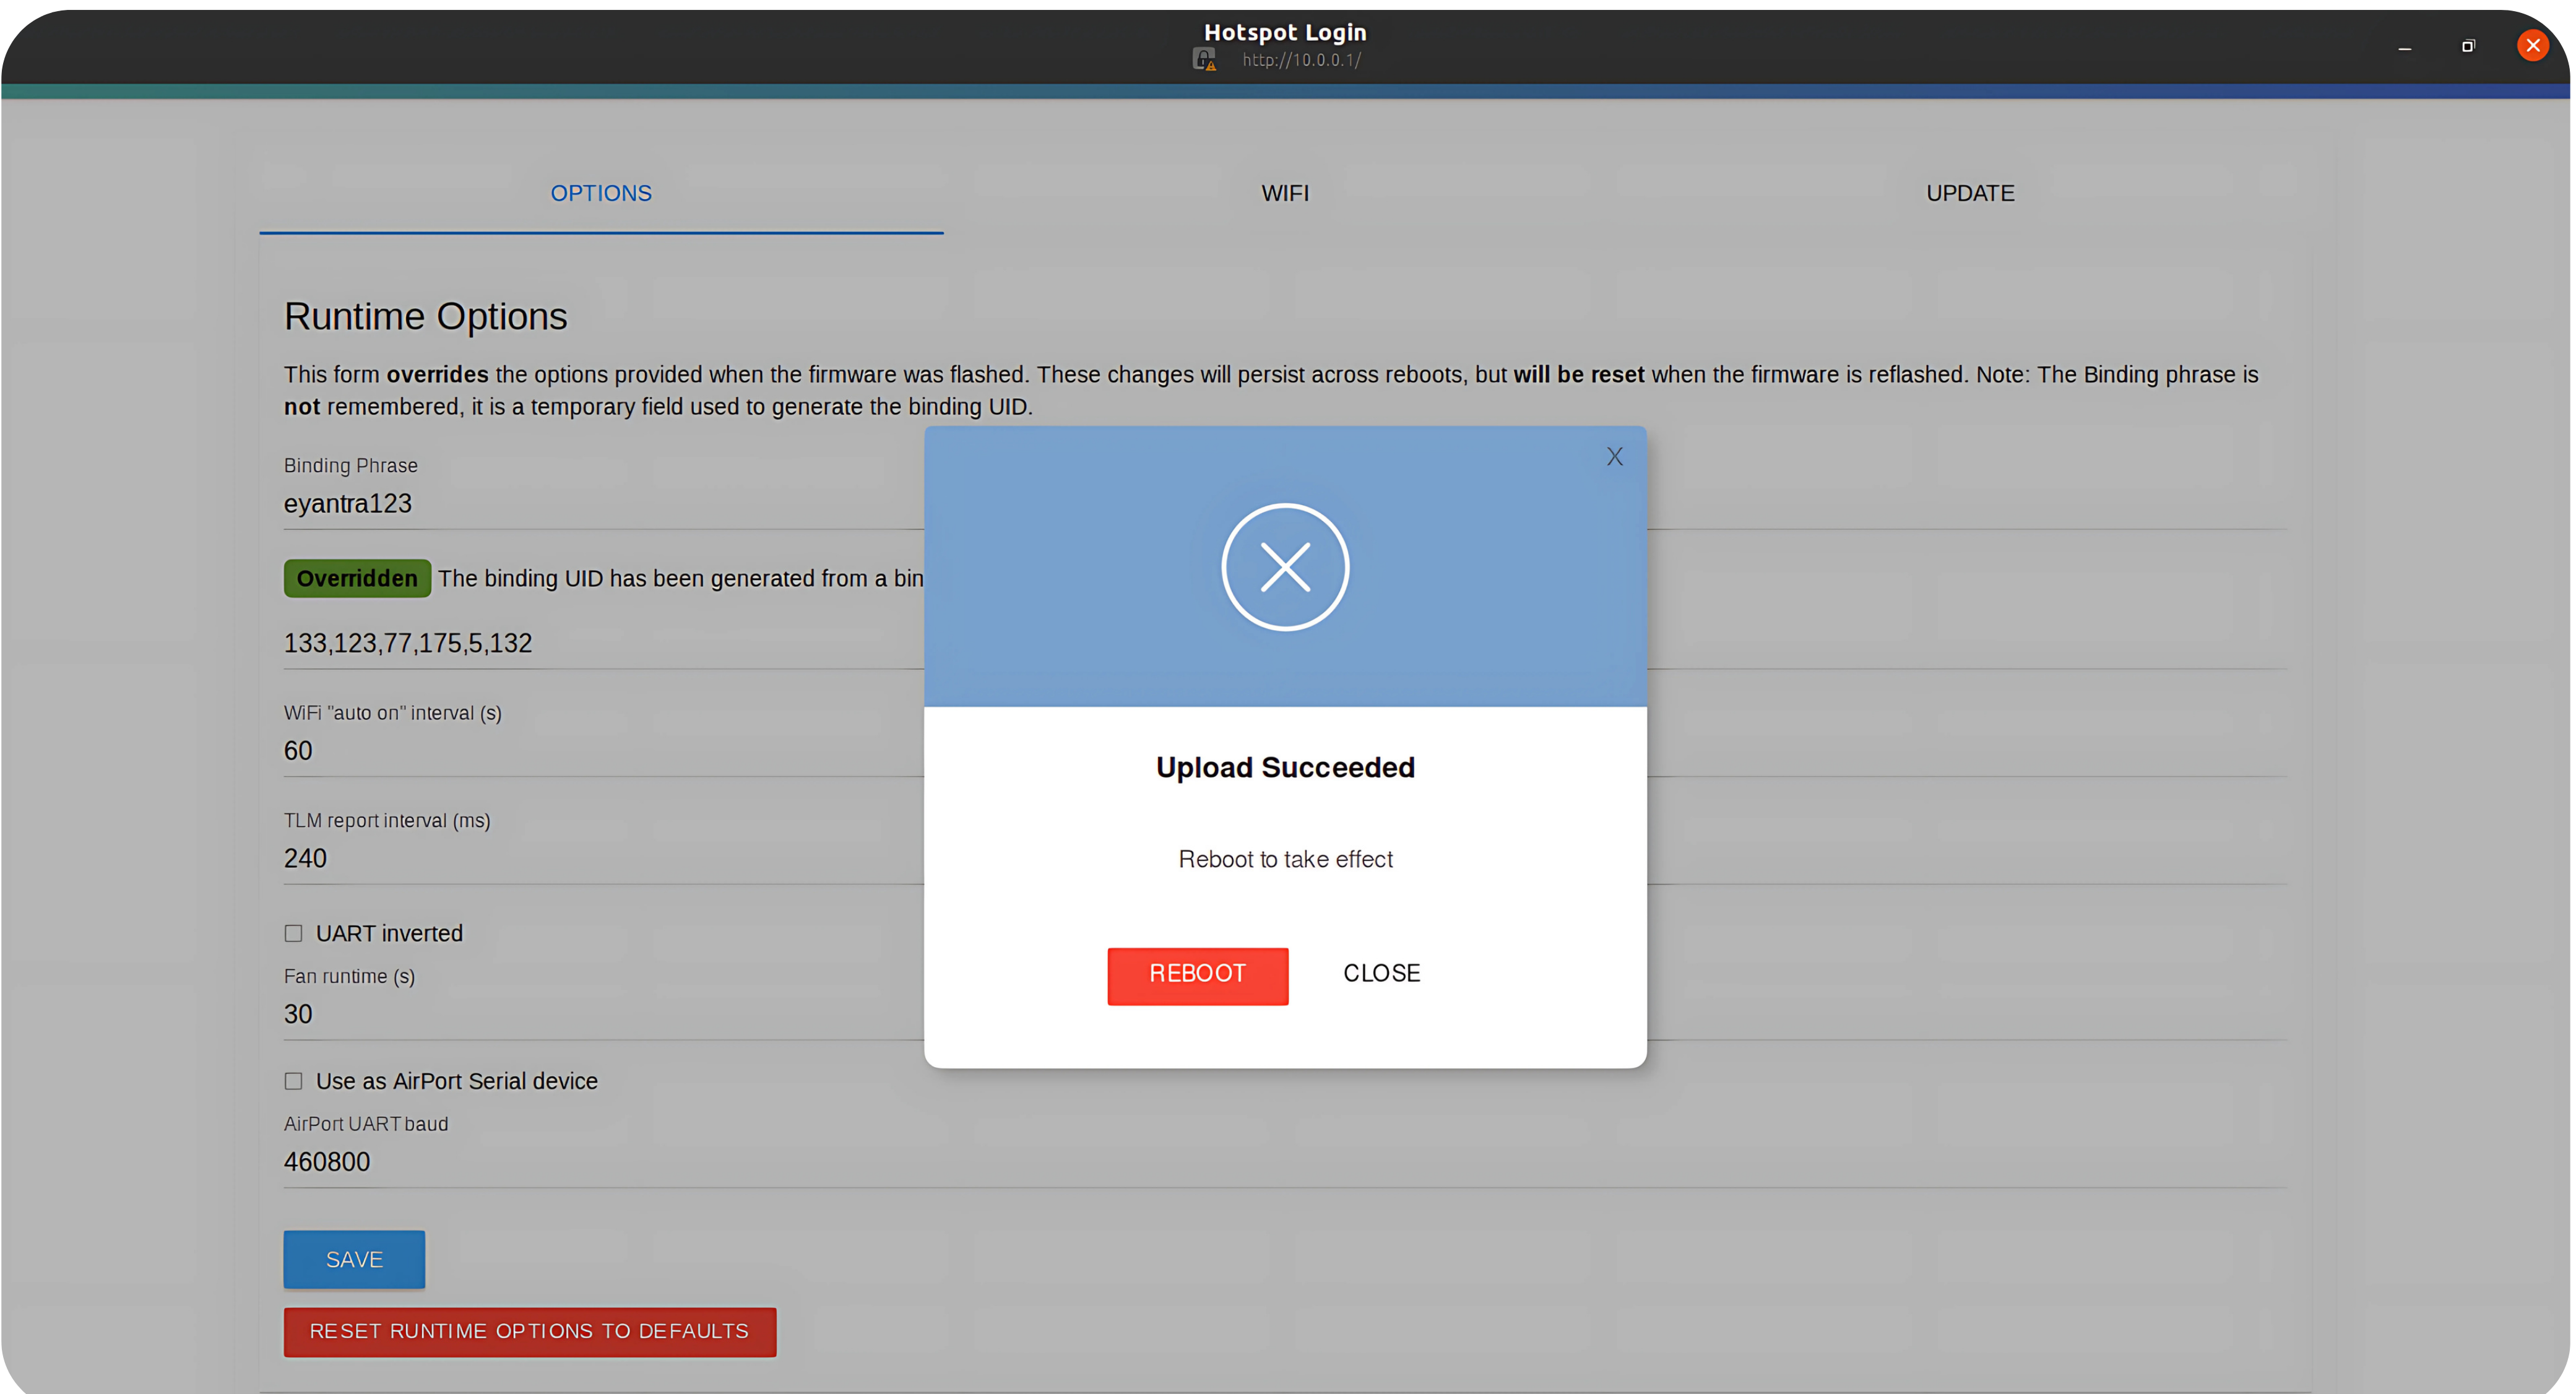
Step 10: Reboot the Transmitter
Click the Reboot button to apply the settings.
After rebooting, your transmitter will display the screen shown in Fig 6. Navigate to the
Exitoption using the scroll wheel and press the center to confirm. This completes the binding process for the transmitter.
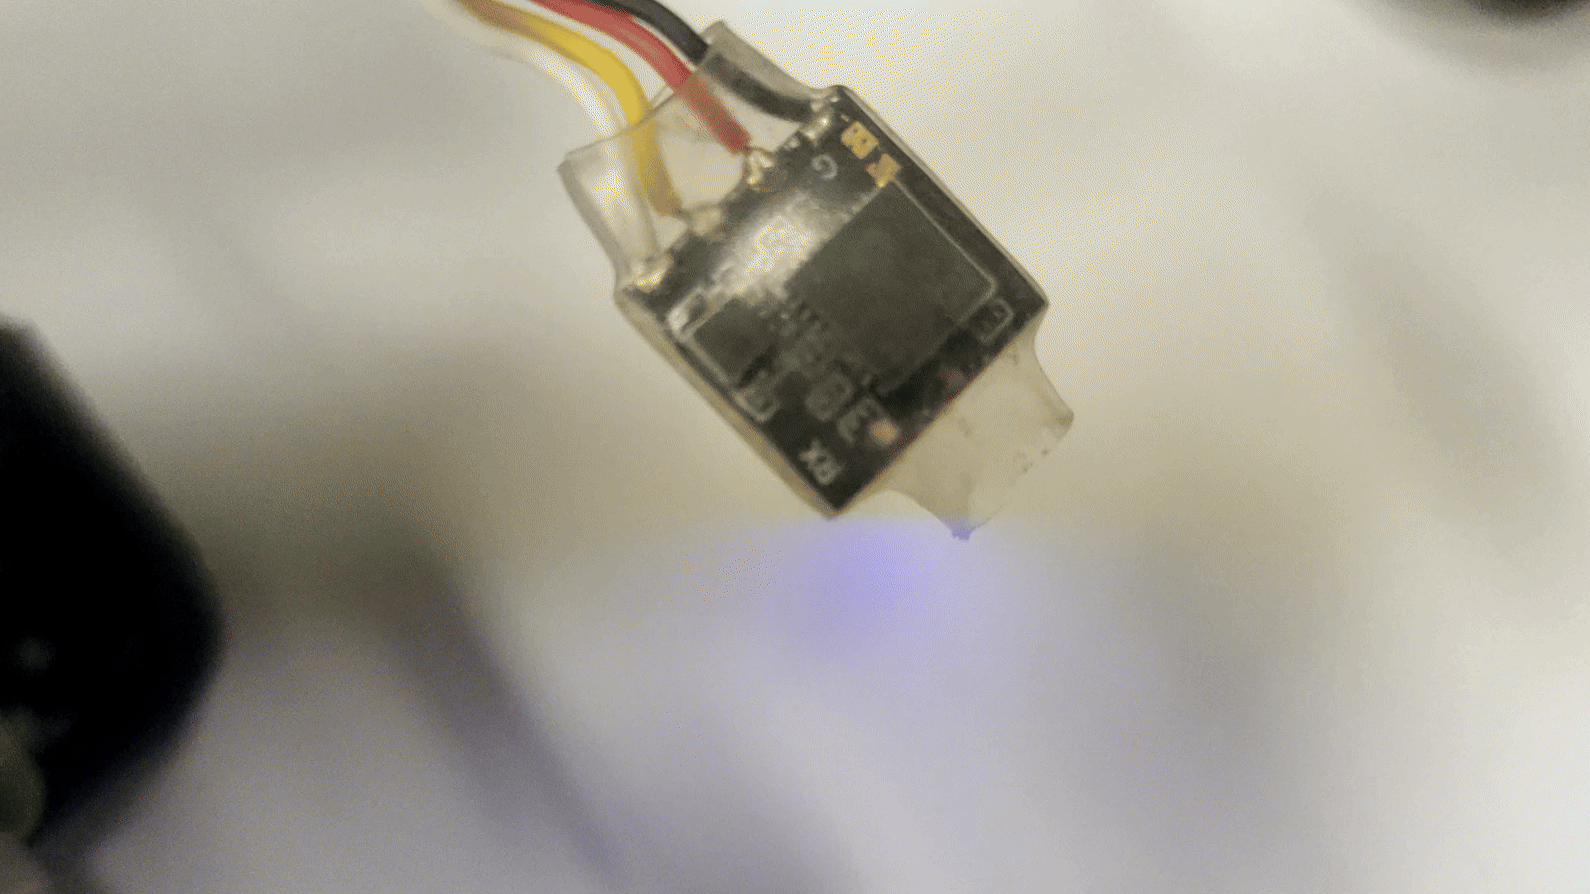
GEPRC ELRS NanoSE Receiver Binding Setup
Step 1: Power On the Drone
Wait for some minutes to go into wifi mode, it will blink very fast that notifies it has gone to wifi mode.
Step 2: Connect to Hotspot
On your laptop, connect to the
ExpressLRS RXhotspot. The password for the hotspot isexpresslrs.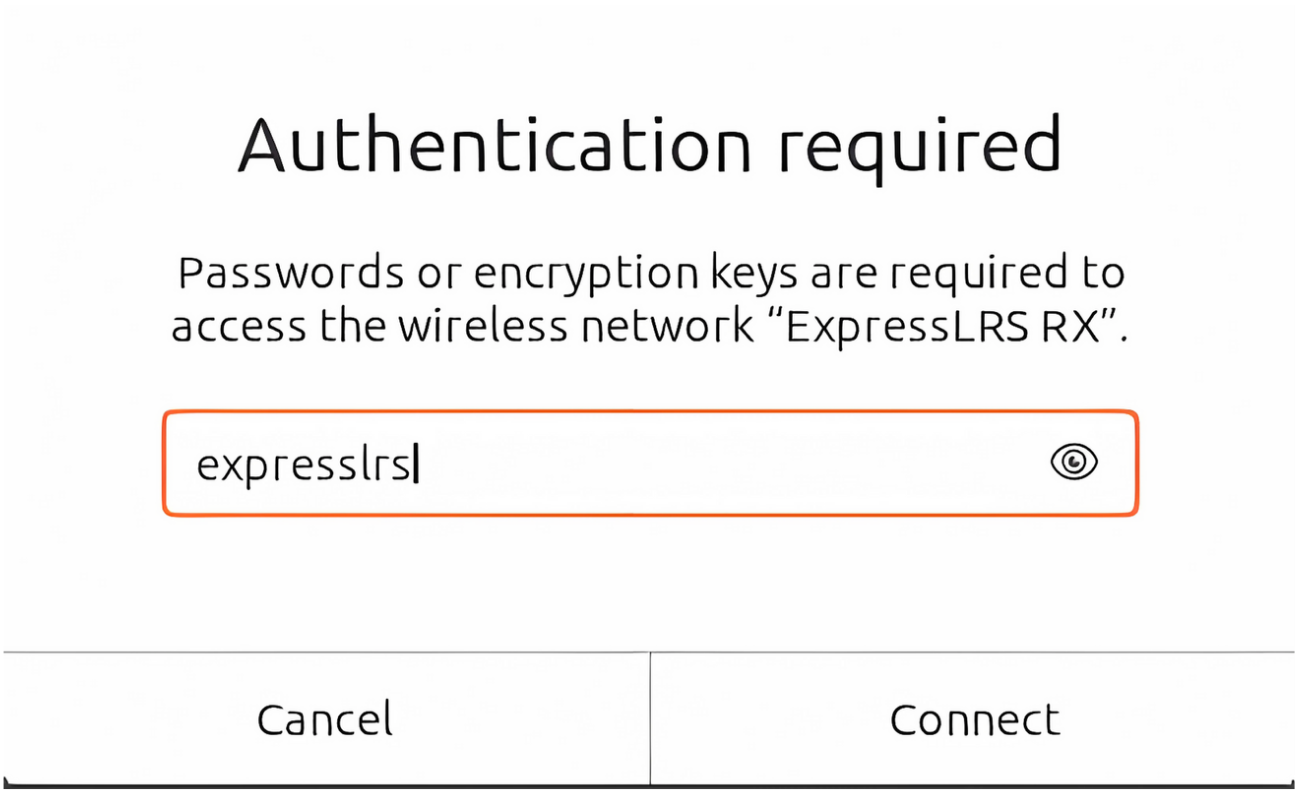
Step 3: Access the Configuration Page
Once connected to the hotspot, open a browser and navigate to http://10.0.0.1/. If the page does not open automatically, manually type the URL in the browser.
Step 4: Set the Binding Phrase
In the configuration page, set the Binding Phrase. It is crucial that both the receiver and transmitter are using the same Phrase. The default Phrase is
eyantra123.
Step 5: Save the Configuration
After ensuring the correct settings, click the Save button.
Step 6: Reboot the Transmitter
- Click the Reboot button to apply the settings. The binding of Receiver is done, it will go to normal mode, wait until it again goes in WiFi mode and then restart the drone.
ER6 2.4GHz ELRS PWM Receiver Binding Setup
Step 1: Power On the Drone
Wait for some minutes to go into wifi mode, it will blink very fast that notifies it has gone to wifi mode.

Step 2: Connect to Hotspot
On your laptop, connect to the
ExpressLRS RXhotspot. The password for the hotspot isexpresslrs.
Step 3: Access the Configuration Page
Once connected to the hotspot, open a browser and navigate to http://10.0.0.1/. If the page does not open automatically, manually type the URL in the browser.
Step 4: Set the Binding Phrase
In the configuration page, set the Binding Phrase. It is crucial that both the receiver and transmitter are using the same Phrase. The default Phrase is
eyantra123.
Step 5: Save the Configuration
After ensuring the correct settings, click the Save button.
Step 6: Reboot the Transmitter
- Click the Reboot button to apply the settings. The binding of Receiver is done, it will go to normal mode, wait until it again goes in WiFi mode and then restart the drone.