Swift Pro Experiments
How to Fly!!
- Anyone who flies the drone need to know proper piloting before flying the drone.
Disclaimer : In any case if you miss to follow the instruction manual, e-Yantra is not responsible for any loss.
Important Note :First learn to fly in simulator ex. LiftOff for atleast 50 to 60 hours and first flight should be in Stabalize Mode.
Ensure Your Setup is Complete
- Confirm that your setup is complete.
- Select the Swift Pro model on your Radio Master.
- Verify that the Cellular Tower is visible on the Swift Pro screen.
- Ensure the drone can be armed and disarmed properly.
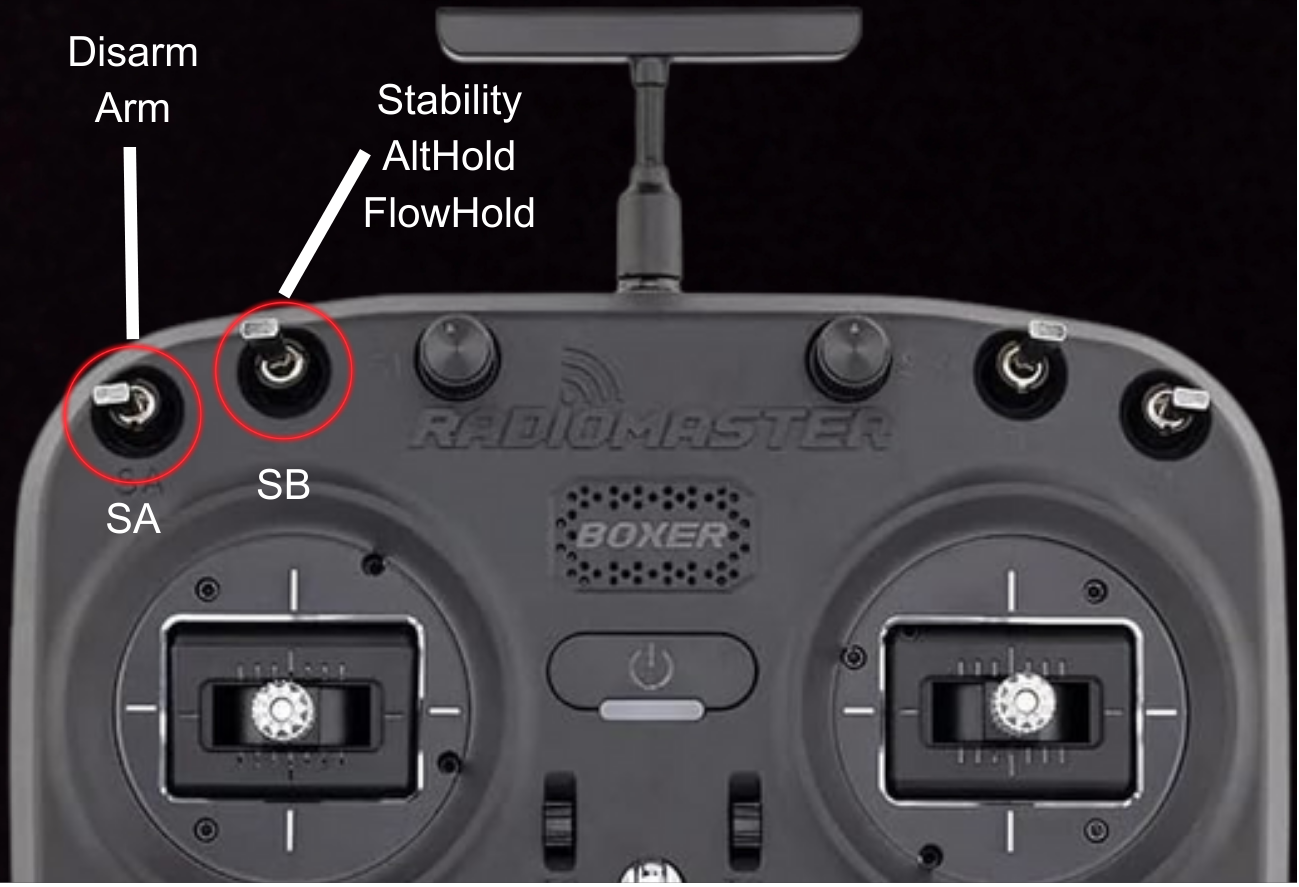
The SA button controls the Arm/Disarm function.
- SA Switch UP: Disarm State.
- SA Switch DOWN: Arm State.
The SB button controls the Flight Modes.
- SB Switch UP: Stabilize Mode.
- SB Switch CENTER: AltHold Mode.
- SB Switch DOWN: FlowHold Mode.
1. Fly in Stabilize Mode
- This mode is essential for all other flight modes.
- Prerequisite: Learn to fly a drone using a simulator. Aim for about 40-50 hours of practice. You can use the Liftoff Simulator.
Once you've learned to fly, follow these steps while prioritizing safety:
- Ensure the throttle stick is down and the roll/pitch is centered.
- Pull the SA switch down (SA: DOWN) to arm the drone.
- Keep the SB switch up (SB: UP) in Stabilize Mode initially.
- Gradually increase the throttle to lift off and land.
- As you gain confidence, practice performing roll and pitch maneuvers.
- After some practice, you’ll be ready to fly in different modes.
2. Fly in AltHold Mode
- Prerequisite: You must master Stability Mode to maintain manual control if the drone goes out of control.
- Once you're proficient in Stability Mode, you can move to AltHold Mode.
- Ensure the throttle stick is down and the roll/pitch is centered.
- Pull the SA switch down (SA: DOWN) to arm the drone.
- Set the SB switch to center (SB: CENTER) for AltHold Mode.
Key Points:
- In AltHold mode, you provide velocity rather than angles. At 0% throttle, the drone will begin to decelerate based on the settings in the full parameter list.
- At 50% throttle, the drone will maintain its current position.
- At 100% throttle, it will climb at the rate specified in the parameter list.
- Between 0-50%, the throttle maps speed from 0 to maximum deceleration.
- Between 50-100%, it maps speed from 0 to maximum acceleration.
- Gradually increase the throttle to lift off and land.
- This mode will automatically level the drone, but you still need to manage roll and pitch.
The RangeFinder operates effectively up to 120 cm from the ground; beyond that, the barometer takes over due to sensor limitations. If the drone becomes unmanageable, switch back to Stability Mode (SB: UP) to regain control.
3. Fly in FlowHold Mode
Disclaimer: Requires good texture surface for optical flow sensor.
- Prerequisite: You must master Stability Mode to maintain manual control if the drone goes out of control.
- Once you're proficient in Stability Mode, you can move to FlowHold Mode.
- Ensure the throttle stick is down and the roll/pitch is centered.
- Pull the SA switch down (SA: DOWN) to arm the drone.
- Set the SB switch down (SB: DOWN) for FlowHold Mode.
Key Points:
- Similar to AltHold, in FlowHold mode, you provide velocity instead of angles. At 0% throttle, the drone decelerates based on parameter settings.
- At 50% throttle, it maintains its position.
- At 100% throttle, it climbs according to the parameter list.
- Gradually increase the throttle and wait a few seconds for the drone to respond.
- The RangeFinder works effectively up to 120 cm; beyond that, the barometer takes over.
- To lock the drone's position on the roll and pitch axes, it uses an optical flow sensor. This may take several seconds and requires a good ground texture for effective locking.