RadioMaster Boxer 2.4g Remote Control System
Description
The RadioMaster Boxer is a versatile 2.4GHz remote control system suitable for a wide range of RC models including fixed-wing aircraft, helicopters, multi-rotors, cars, boats, robotics, and more. Featuring EdgeTX firmware, the Boxer is designed for both beginners and professionals. With powerful hardware and a wide range of compatible protocols, this controller offers an intuitive setup and smooth control for all your RC needs.
Key Explanations
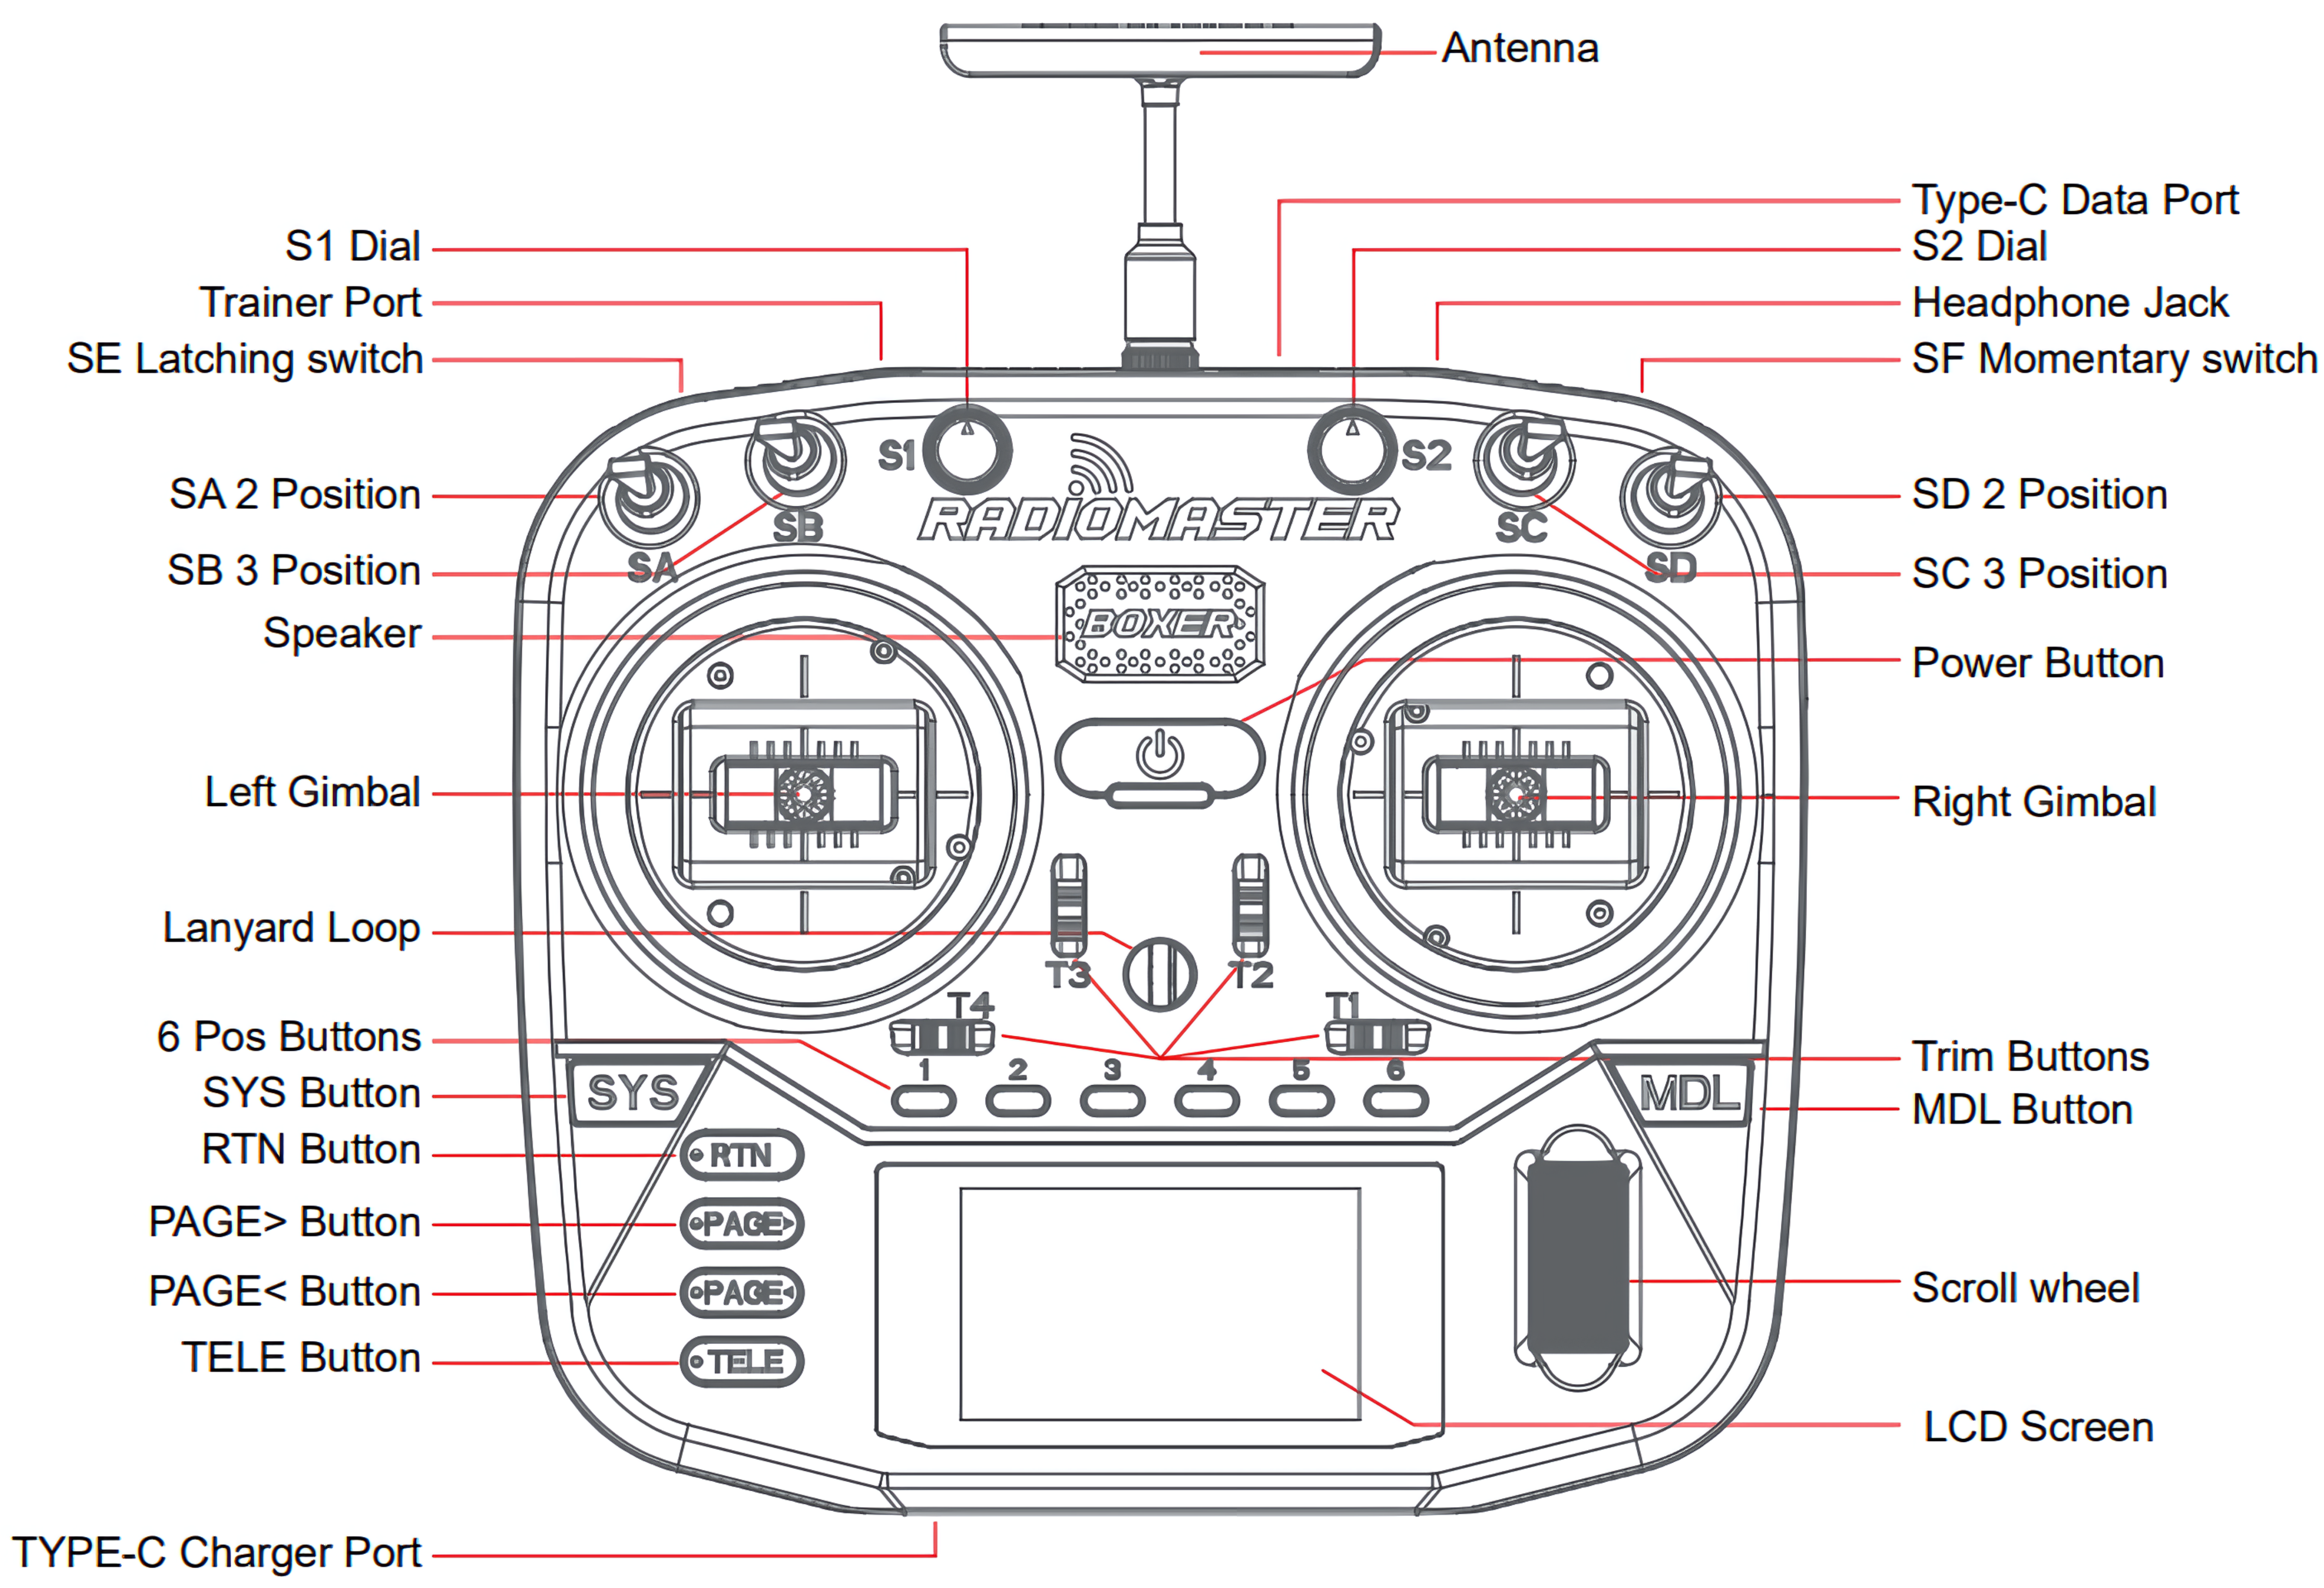
- Antenna: Ensure the antenna is installed before powering up the radio. The internal RF module will be damaged if operated without the antenna.
- LCD Screen: Displays all system and model information.
- Trim Buttons: For fine-tuning control axes.
- Gimbals (Left/Right): High precision Hall gimbals for smooth control.
- S1, S2 Dials: Used for continuous adjustments (e.g., throttle curve, gain).
- SA, SB, SC, SD, SE, SF Switches: Used for various control functions (e.g., flight modes, gear control).
- Scroll Wheel: For easy menu navigation.
- Trainer Port: Used for connecting with another controller in trainer mode.
- USB-C Charger Port: For charging the built-in 7.4V 2-cell Li-Po battery pack.
- MDL Button: Access model settings.
- SYS Button: Access system settings, including protocol and model configuration.
- RTN Button: Back Button for moving out of settings.
- PAGE> Button: To move pages front.
- PAGE< Button: To move pages back.
- TELE Button: To see the drone data such as battery, flightMode,etc.
How to Set Up Your Model
Power on your Boxer transmitter: Press and hold the power button until the display turns on.
Select your protocol:
- Press the MDL button to enter the model settings.
- Scroll the Scroll Wheel to an empty option to make new Model, and press the scroll wheel to Create model.
- Press the Page> button to setup the model on page 2.
- Press the Scroll wheel to name the Model, and then scroll the scroll wheel to select the character [0-9,A-Z,a-z].
- Note where you don't want any character and empty space just press the scroll wheel and move ahead.
- After naming is completed scroll the wheel to set Internal RM Mode from
OFFtoCRSFby pressing and then scrolling to CRSF and then again pressing the scroll wheel.
- Go to Page 5 using
Page>button you can see theINPUTS. - Ail is Aileron in our case it will be Roll.
- ELE is Elevator in our case it will be pitch.
- Thr is Thruster in our case it will be Throttle.
- Rud is Rudder in our case it will be Yaw.
- These 4 paramaters are already created by default, so we will create a Arm Disarm and Flight Mode buttons.
- Channel 5 is empty so press the scroll wheel and set the
Name: ARM by using scroll wheel process is same as previous and set switch to SA. - Change Page and go to mixer can create a same option at channel 5 most of the thing will be automatically imported from INPUT channel 5.
- Same way create Input -> channel 6 for FM i.e Flight Modes and set the Switch to SB and create mixes same as previous step.
Setup a Telementry Screen.
- Go to page 12 and see the Screens options.
- Go to Empty Space and set the
FMoption i.e Flight Mode,BxTxfor drone battery,SATfor GPS Satellit count.