Garuda Mini Drone Setup Guide
Overview
This guide provides detailed steps to set up your Garuda Mini drone using Ardupilot firmware. Since the drone is large and not easily connected to a laptop or PC, we will use a telemetry module for wireless communication. This will allow you to calibrate the drone and access telemetry data efficiently.
Step 1: Choose Firmware Type
Ardupilot Firmware
Ardupilot is a robust open-source firmware designed for various types of drones, supporting advanced features like autonomous flight, waypoint navigation, and mission planning. It is continuously updated by a dedicated community. Download the latest version suitable for your flight controller from the official Ardupilot repository.
Step 2: Choose Flight Controller Type
Select the appropriate flight controller for your drone. Examples include:
- Pixhwak 6C X500 V2
Step 3: Cable Connections
Install Mission Planner Software:
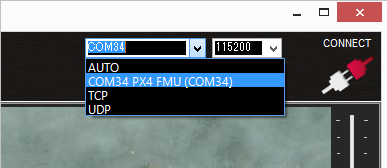
- Open Mission Planner.
- Select the correct COM port for the telemetry module.
- Click Connect to establish communication with the drone ensure drone is power on.
Connect the data cable to Flight Controller Pixhwak 6C X500 V2.

Step 4: Flash Firmware to Flight Controller
Using Mission Planner (
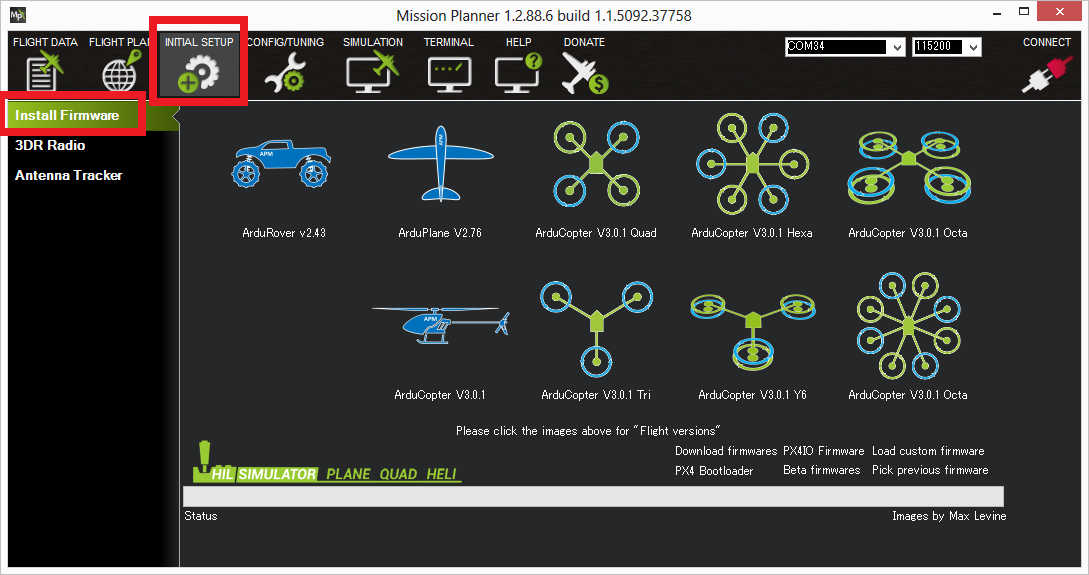
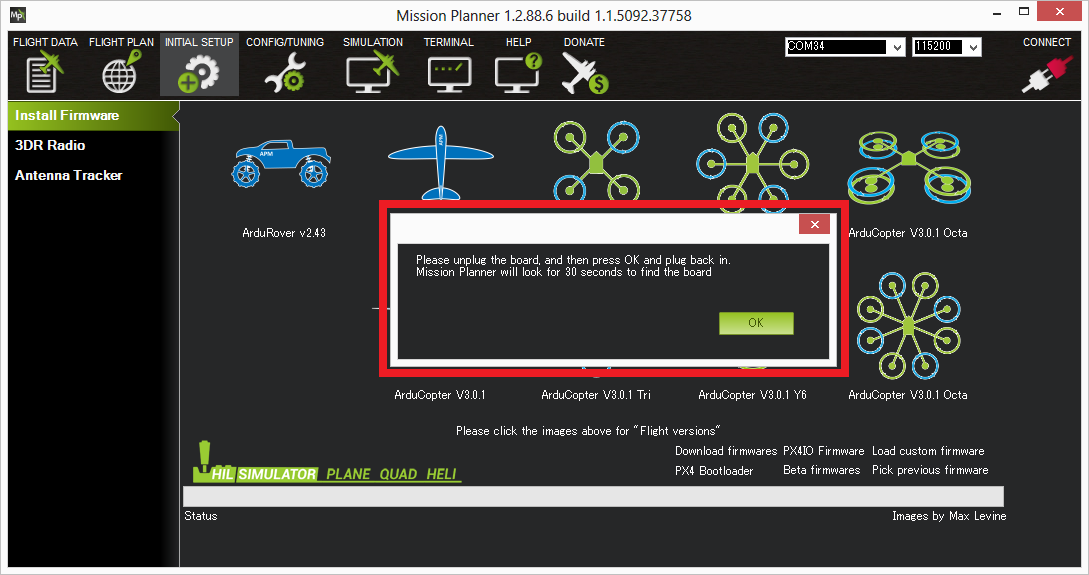
.apj)Step 1: Open Mission Planner and Go to Initial Setup -> Install Firmware .
Step 2: Select Com Port and Check if Visible DO NOT CONNECT IT."
Step 3: Ensure Internet is Connected to your Laptop and Click on QuadCoptor Select Pixhwak6x and Download the Firmware.
Step 5: Connect Telemetry Module
- Connect the Telemetry Module:
- Connect the telemetry module to your flight controller.
- Connect other telemetry module to your Laptop.
Step 6: Configure Parameters
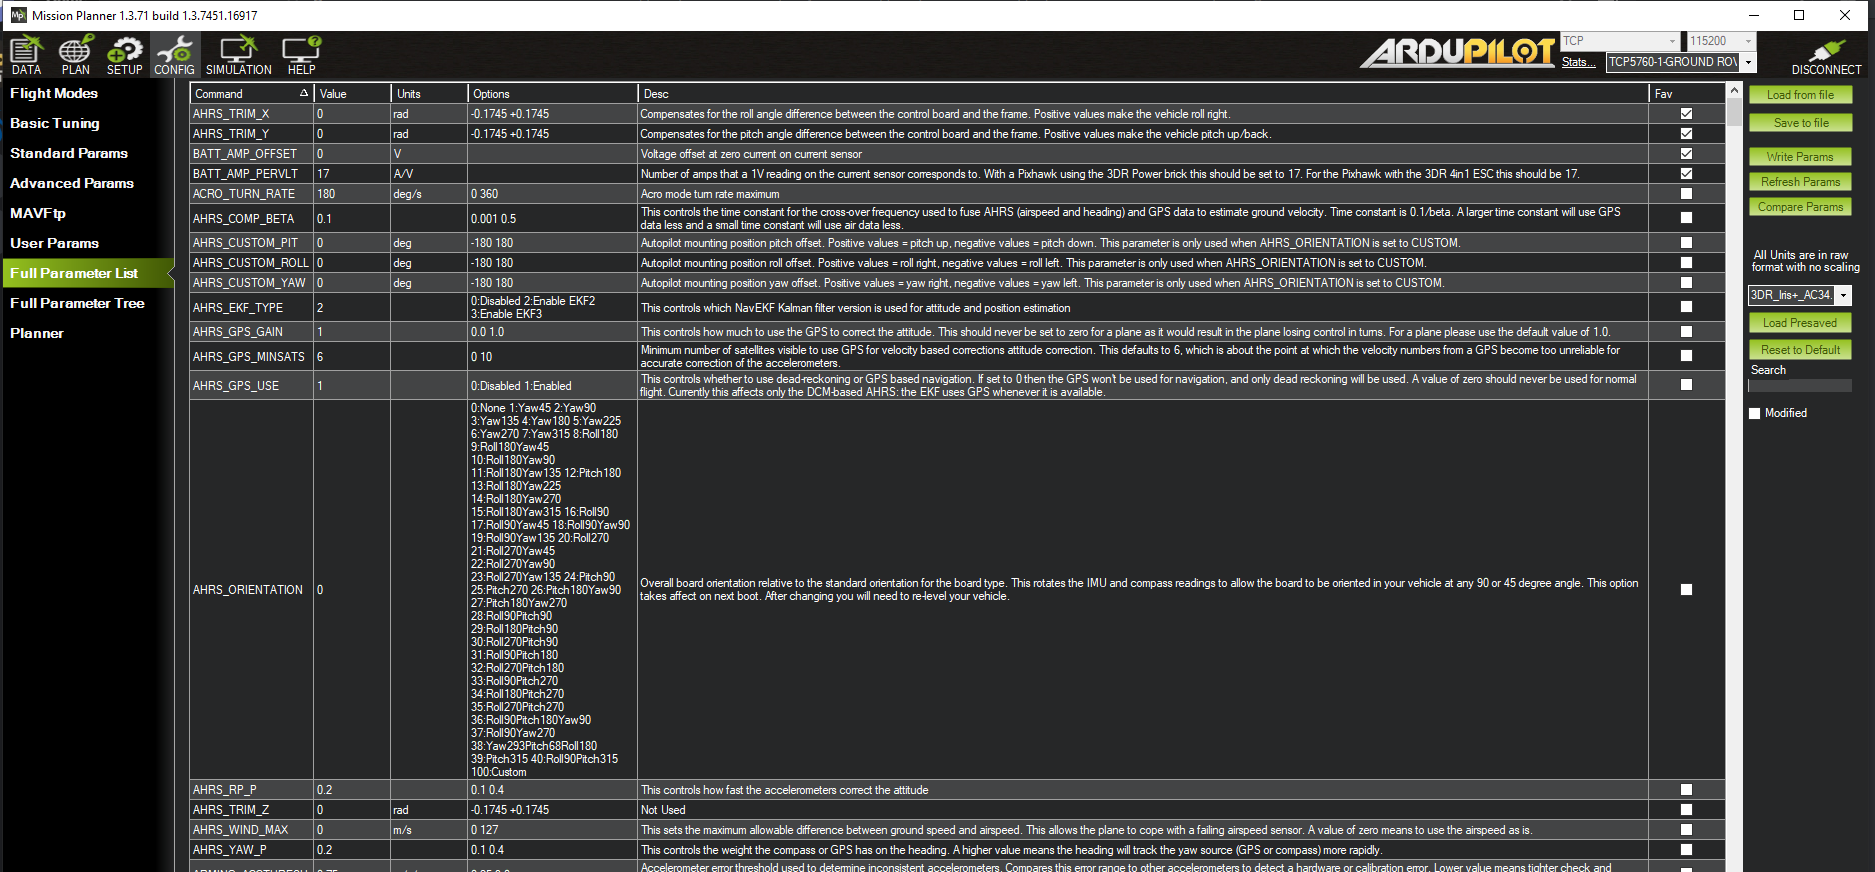
Navigate to Config in the Navigation Bar:
- Select Full Parameter List.
- Click Load From File and upload the parameter file
GarudaMini.param. - Confirm the upload by clicking Write parameters.
Step 7: Calibrate & Test Drone
Connect to Mission Planner:
- Open Mission Planner and connect via the telemetry module.
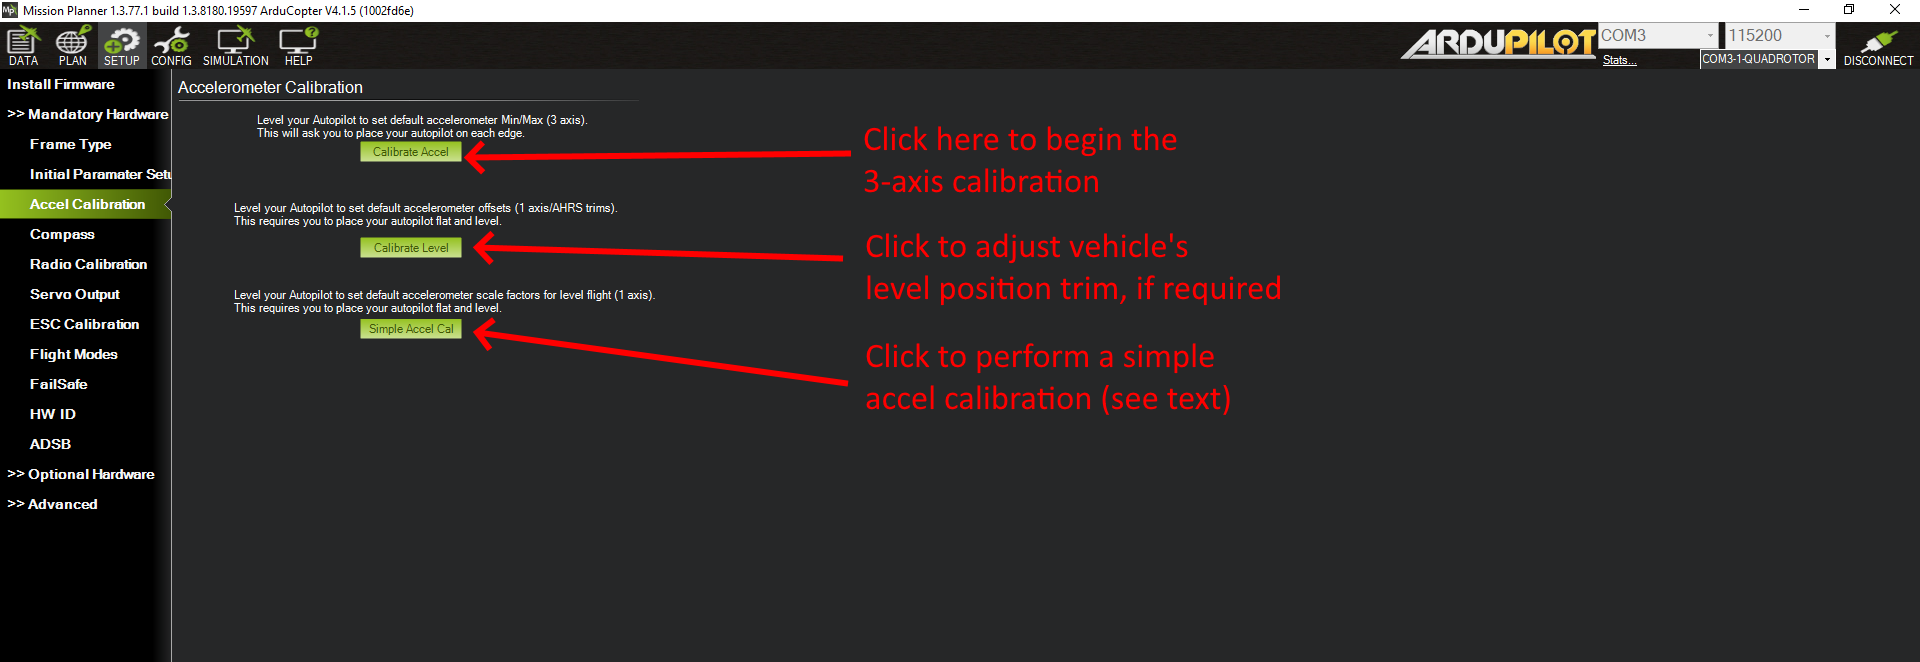
- Go to the Setup Icon, then "Accel Calibration."
- Follow prompts for 3-axis calibration and confirm success.

Select Compass from the left panel in Mandatory Hardware.
Untick Use Compass 2 and Use Compass 3.
Click on the Start Button.
Hold the vehicle in the air and rotate it so that each side (Nose Up, Nose Down, left, right, top, and bottom) points down towards the Earth for a few seconds. Consider performing a full 360-degree turn with each orientation pointing towards the ground. This may require multiple turns to confirm calibration or to retry if it initially does not pass.
- On your RadioMaster, select the Drone Model and ensure it is connected to the drone.
- Note: Ensure the battery is not connected.
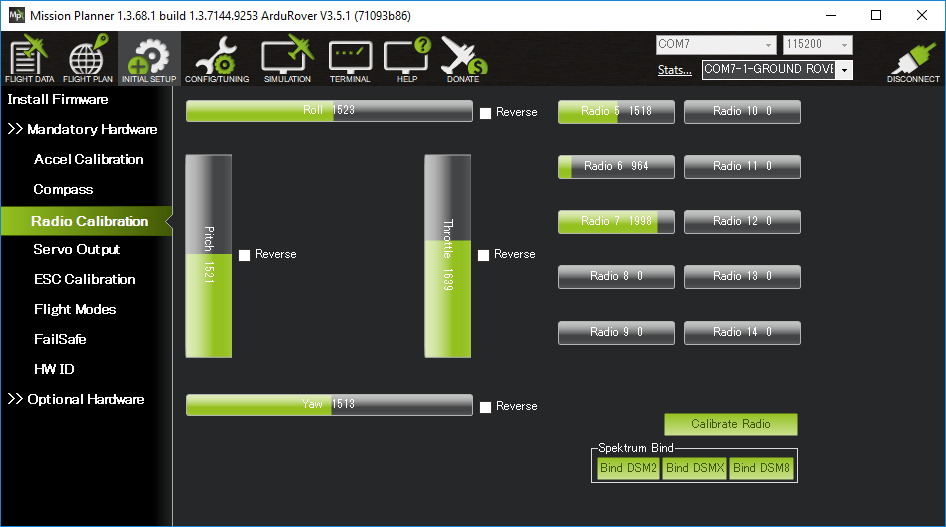
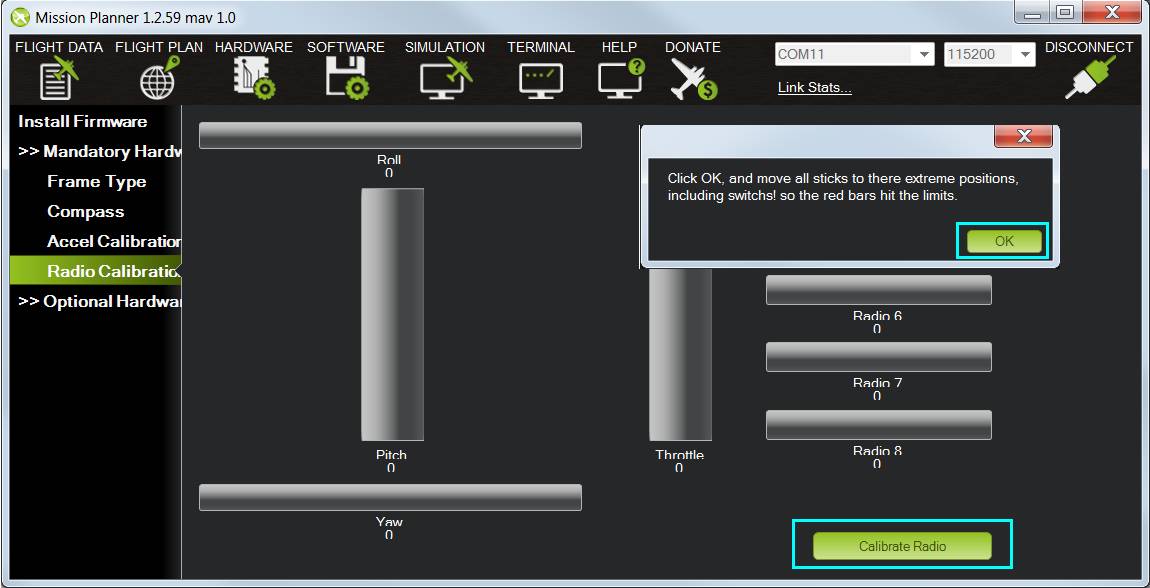
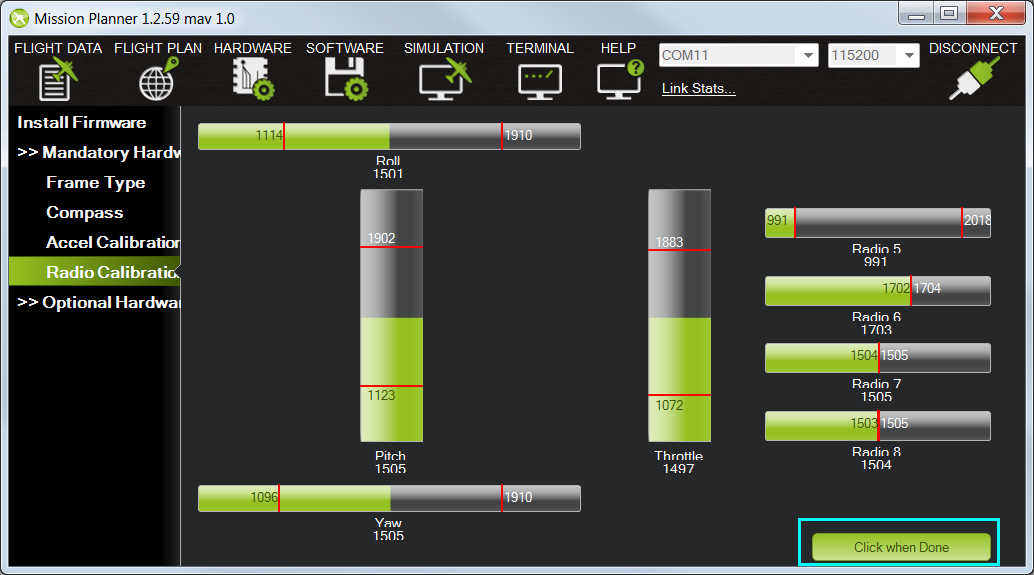
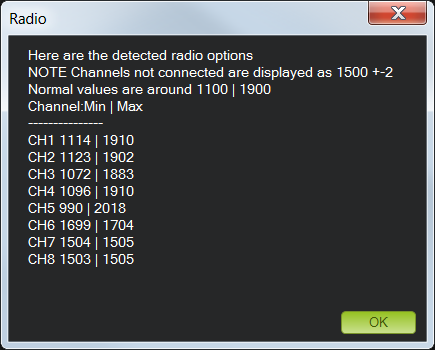
- Select "Radio Calibration" from the left panel in Mandatory Hardware.
- Move the controller stick; you should see the minimum and maximum levels of RC channels.
- Ensure it is increasing and decreasing according to the stick movements; otherwise, refer to the documentation.
Flight Mode
- Select the
Flight Modesoption in Mandatory Hardware. - On your Radio Master, there is a second button labeled
SBon the top left corner with a tri-state output. 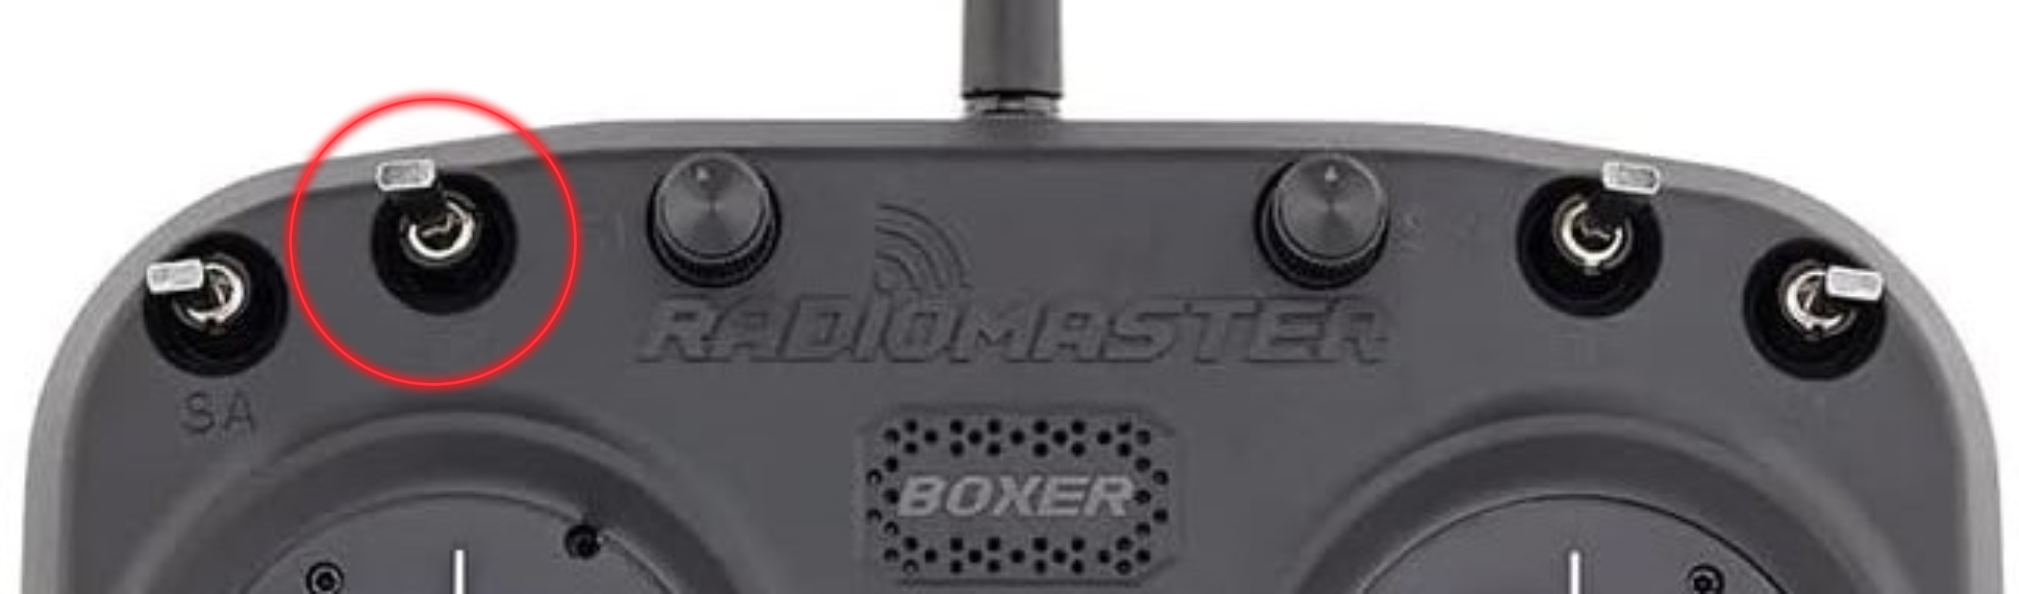
- You will see that switching the buttons changes the mode highlighted in green in Mission Planner.
- Select the appropriate mode, or keep it as default. The safest mode is
AltHold.
- Select the
- Ensure safety protocols are followed.
- Note: Remove Properllers of the drone and then insert a battery.
- Note: Turn off the RC receiver and Remove the Propellers of drone to ensure safety.
- In the Optional Hardware section, open "Motor Test."
- The direction of the propeller is explained in the diagram below.

- The drone frame type is Betaflight X, so the direction of propellers is shown below.
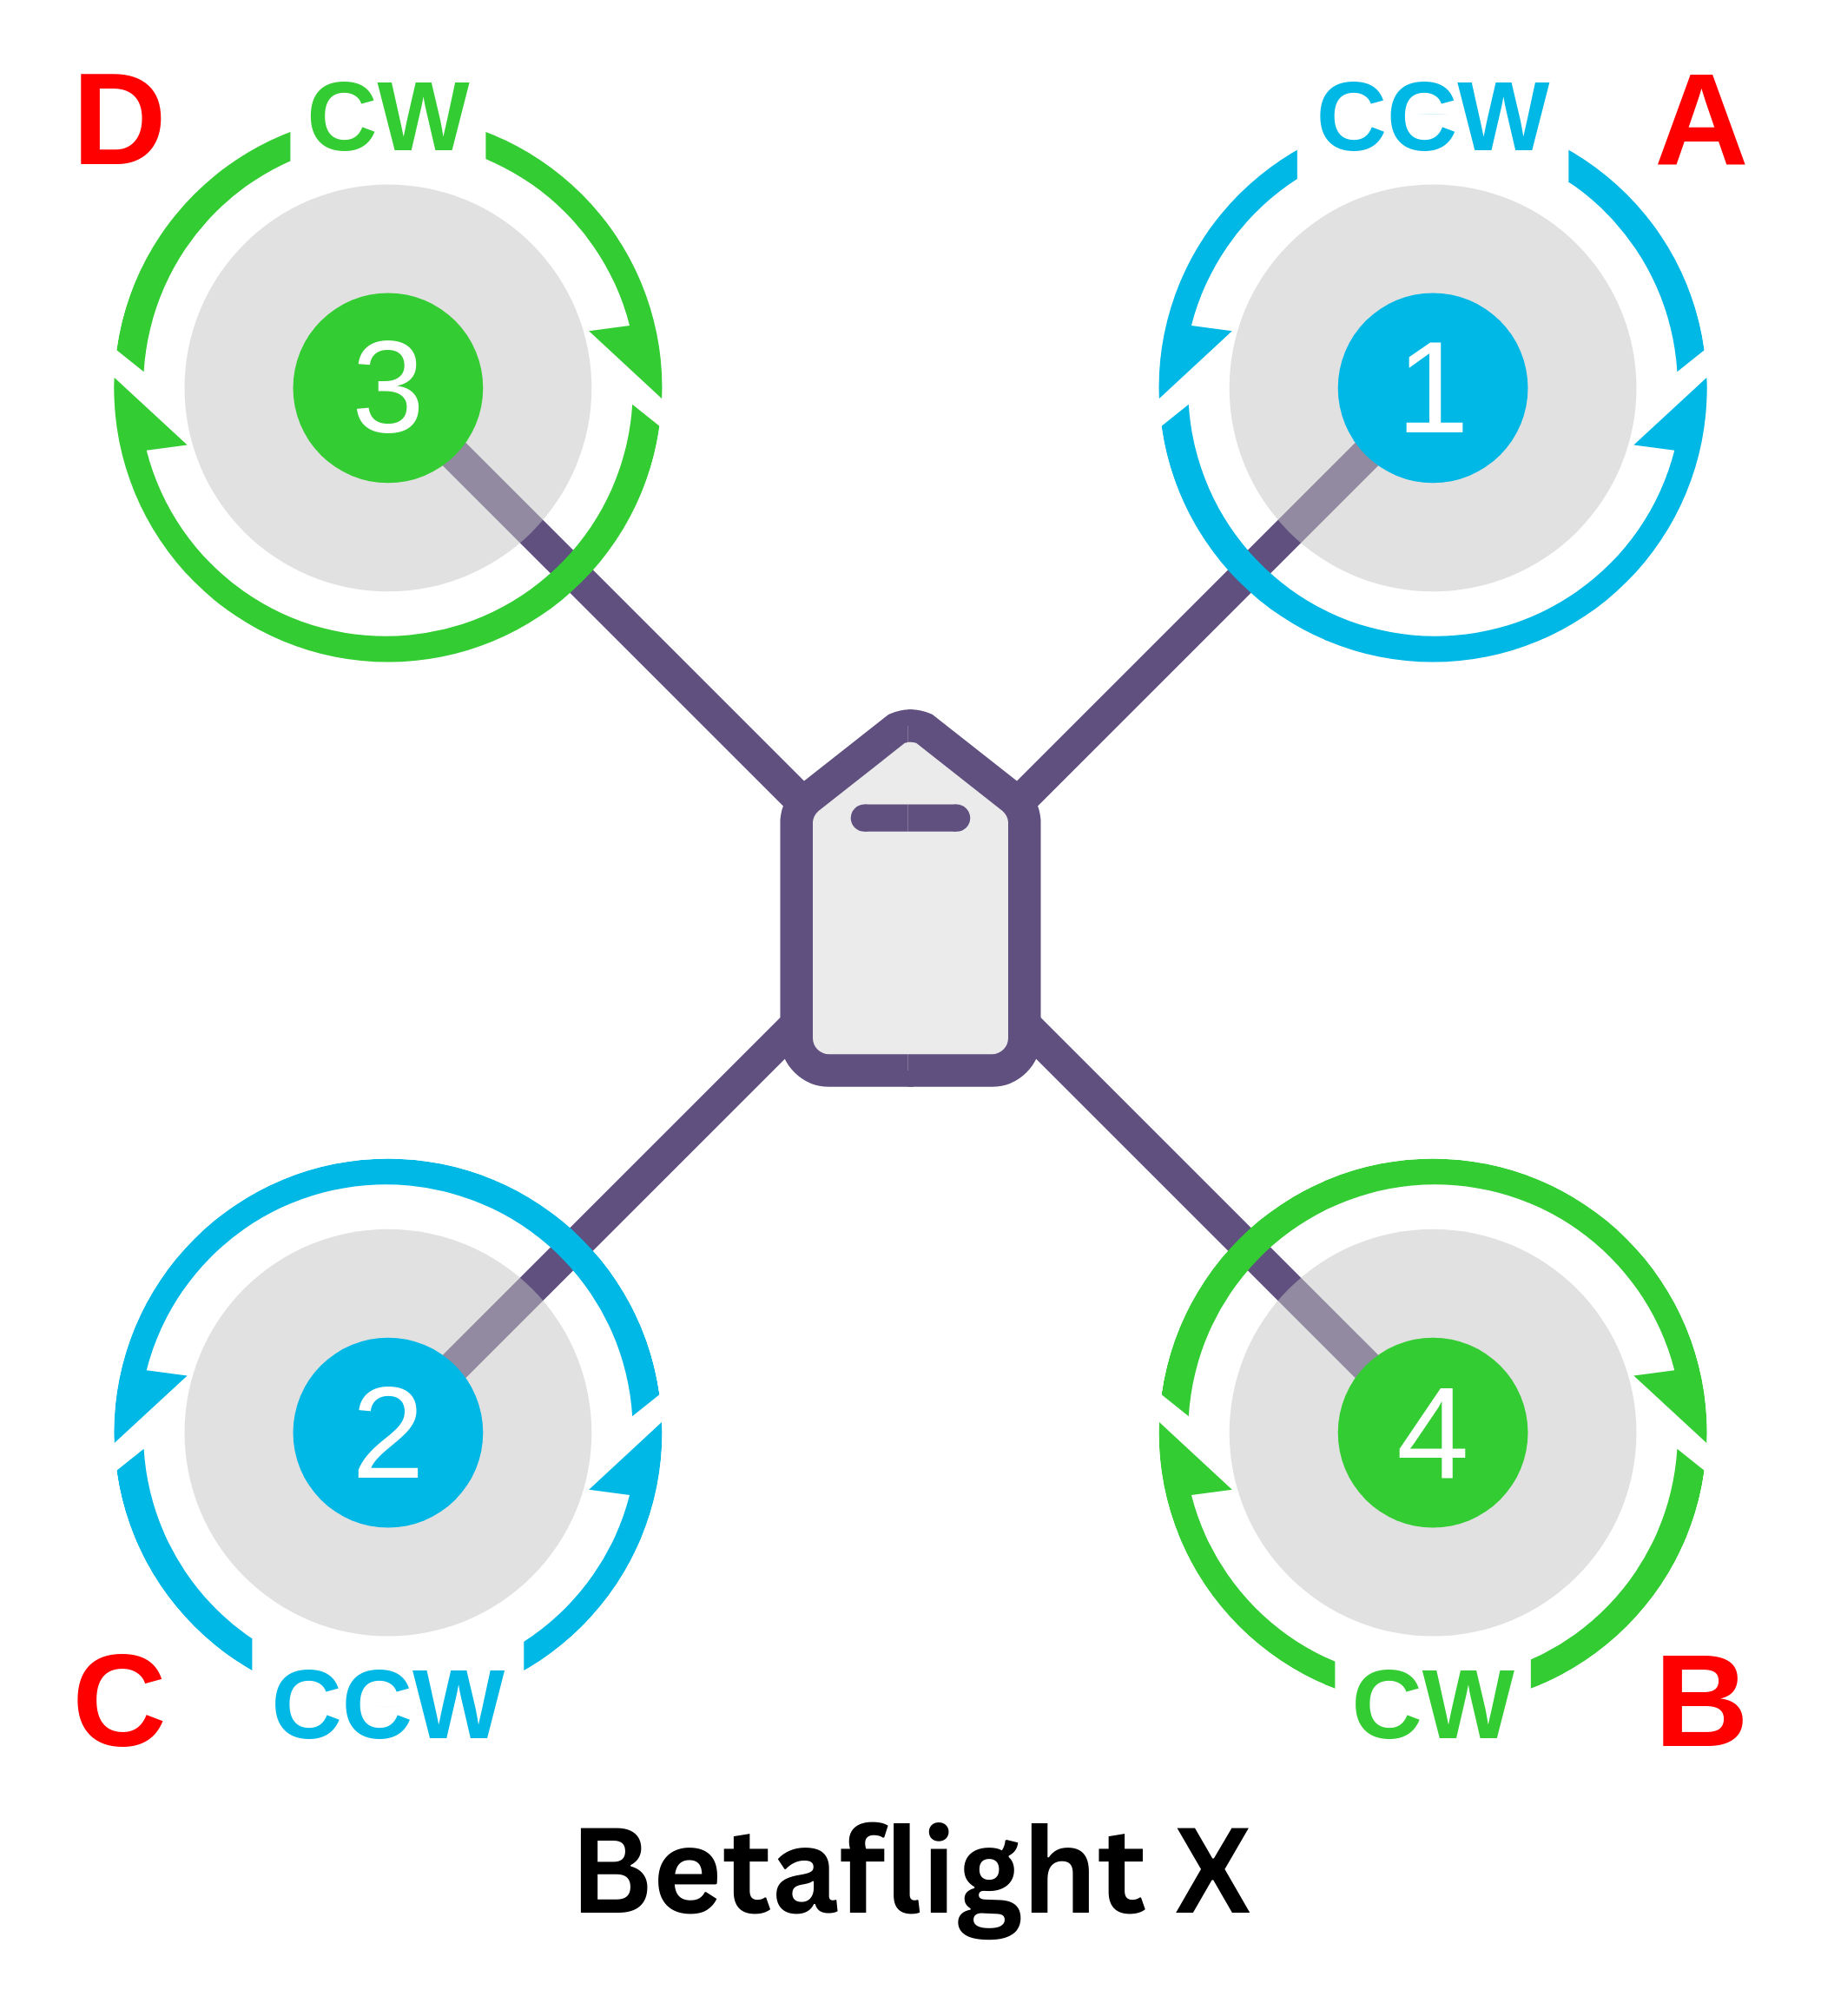
- Click the "Test Motor" [
option] and ensure the direction mentioned in Mission Planner matches the diagram above.peller directions.
Additional Resources
Note: Always follow safety protocols during setup and testing to prevent damage to your drone or personal injury.